

Learning how to clean your breast pump is one of those non-negotiable tasks that quickly becomes second nature. The basic rule is simple: after every single pumping session, you need to disassemble and wash all the parts that came into contact with your milk. Then, just let them air-dry completely. For an extra layer of germ-fighting power, especially when your baby is a newborn, daily sanitizing is the way to go.
Getting this routine down is one of the most important things you can do for your baby's health and your own peace of mind.
Your Guide to Stress-Free Pump Cleaning
Hey, new parent! I know you've got a million things on your plate right now, and figuring out the ins and outs of breast pump cleaning shouldn't be another source of stress. This guide is here to cut through all the noise and show you exactly why a solid cleaning habit is so critical for your little one's well-being.

We'll walk through the essentials together—from what a quick wash looks like to what a deep sanitization really means. My goal is to help you feel totally confident that you're doing it right every time. After all, proper hygiene is your best defense against nasty germs, and we'll make sure you've got it mastered.
Top-rated pumps + accessories
Pumping made simpler
Take 25% off at checkout, applied automatically when you shop through this link.
Shop with READER25 →Free US shipping over $100. Code applies automatically at checkout.
Why Meticulous Cleaning Matters
Every single drop of that liquid gold you pump is precious, and keeping your equipment squeaky clean ensures it stays safe for your baby. The CDC is clear on this: any part of your pump that touches breast milk needs to be washed immediately after you use it. This isn't just a friendly suggestion—studies have shown that improper cleaning can lead to contamination in as many as 25-30% of pumps. That's a scary number, and it can increase the risk of infections for both you and your baby.
Think of your pump parts just like you think of baby bottles or even your own dinner plates. You’d never reuse a bottle without washing it first, right? The same logic applies here. Even the tiniest bit of leftover milk residue can become a breeding ground for bacteria.
Establishing a Simple and Safe Routine
A good cleaning system doesn't need to be complicated or take up your whole day. The real goal is to build a habit that feels so automatic you don't even have to think about it, whether you're pumping at home, at your desk at work, or on the go.
Making this a seamless part of your schedule is a huge part of the pumping journey, especially if you're a working mom. If you need some extra tips on managing pumping outside the home, our pumping breast milk guide for working moms is packed with practical advice.
So, what does a great cleaning routine look like? It boils down to a few key steps:
- Rinse Right Away: A quick rinse under running water stops that sticky milk residue from drying and hardening onto your pump parts. It makes washing so much easier later.
- A Thorough Wash: This means getting in there with hot, soapy water and a dedicated brush to scrub away all the milk fat and protein.
- Let It Air-Dry: This is crucial. Air-drying on a clean towel or drying rack is the best way to prevent moisture-loving bacteria from making a comeback.
These fundamentals are pretty universal for all baby-feeding gear. In fact, you'll find similar principles for washing, sterilizing, and storing in a detailed guide on cleaning baby bottles. Once you get these steps down, you can be sure that every pumping session is safe, sanitary, and worry-free.
Nailing Your Daily Cleaning Routine
Let's be honest, cleaning pump parts after every session can feel like a never-ending chore. The secret is to create a simple, repeatable process that becomes second nature. This is your game plan for daily care, starting the moment you finish a pumping session.
First up, what actually needs washing? The good news is, not every single piece needs a daily scrub-down. You only need to focus on the parts that touch your breast or your milk.
Typically, this means you'll be washing the:
- Flanges (also called breast shields)
- Valves and membranes (those crucial little white or yellow pieces)
- Connectors
- Collection bottles
What about the tubing? Unless milk has somehow backed up into it, you can leave it alone. Most modern electric pumps have what’s called a "closed system," which includes a barrier to prevent this from happening.
The Post-Pump Rinse: Your Biggest Time-Saver
Here’s a little trick that will save you a ton of scrubbing later: rinse your pump parts in cool water as soon as you’re done. It sounds counterintuitive, but hot water can actually make the milk proteins stick to the plastic, creating a stubborn, cloudy film. A quick rinse under cool water gets rid of the residue before it has a chance to set.
After rinsing, you’re ready for a proper wash. I always recommend using a dedicated wash basin just for pump parts and bottles. Your kitchen sink can be a hotbed for bacteria from food prep, so keeping your baby’s gear separate is a huge safety win.
Think of a dedicated basin as a "clean zone" for your baby's feeding equipment. It's a simple step that helps avoid cross-contamination from things like raw chicken juices or other germs that can linger in a kitchen sink.
The Hand-Washing Method
Washing by hand is the best way to make sure you get into every little nook and cranny. Just fill your basin with hot, soapy water. It's a good idea to use a soap specifically for bottles, or at least one that's free of fragrances and dyes, as any residue could irritate your baby.
Grab a dedicated bottle brush and a smaller brush for the tiny parts and give everything a thorough scrub. Pay extra attention to the little crevices in the valves and connectors—that’s where milk fat loves to hide. Once everything is squeaky clean, rinse it all under running water to get rid of any soap.
This handy infographic breaks down the two key phases of keeping your pump gear safe and clean.

As you can see, daily washing is your first line of defense, while sanitizing offers that extra peace of mind.
Leaning on Your Dishwasher
If you're short on time (and who isn't?), the dishwasher can be your best friend. Just make sure you follow a few simple rules to do it safely.
- Check First: Make sure your pump parts are actually dishwasher-safe. Most major brands are, but a quick check of the manual never hurts.
- Top-Rack Only: Always, always place pump parts on the top rack. The heating element at the bottom of the dishwasher can get hot enough to warp or melt the plastic.
- Bag the Small Stuff: A small, zippered mesh bag or a closed-top basket is a lifesaver for tiny parts like valves and membranes. It stops them from taking a tumble and melting on the heating coil.
- Choose the Right Cycle: Opt for a hot water cycle and a heated dry setting. If your dishwasher has a "sanitize" option, even better—use it
Sanitizing for Extra Peace of Mind
While washing your pump parts after every use is your non-negotiable first step, sanitizing is what really gives you that extra layer of confidence. Think of it as taking hygiene to the next level.
This step is especially critical when you have a tiny newborn under three months old, a baby who was born prematurely, or any little one with a weaker immune system. Sanitizing knocks out even more germs than washing alone, which is a huge comfort in those early days. The good news? It's way easier than it sounds.
How Often Do I Really Need to Sanitize?
For newborns and medically fragile babies, the gold standard is to sanitize your pump parts at least once a day. As your baby grows and their immune system gets stronger, you can usually scale back to every few days or even once a week. It’s all about finding a rhythm that feels right for you and your family—and when in doubt, a quick chat with your pediatrician can clear things up.
This focus on pump hygiene is a big deal worldwide. In 2024, North America accounted for 52.41% of the global breast pump market revenue, and a big part of that is the emphasis on safe cleaning practices. It's great to see that around 80% of moms in the U.S. who pump are already following the recommended cleaning steps, showing a real commitment to keeping their babies safe. You can discover more insights about breast pump trends on Fortunebusinessinsights.com.
Just a quick but important reminder: sanitizing only works on parts that are already clean. You have to wash everything with soap and water first to get rid of all that milk residue. Otherwise, you’re just sanitizing dirty parts!
Your Go-To Sanitizing Methods
You've got a few great options for sanitizing, so you can pick whatever fits best with your life and kitchen setup.
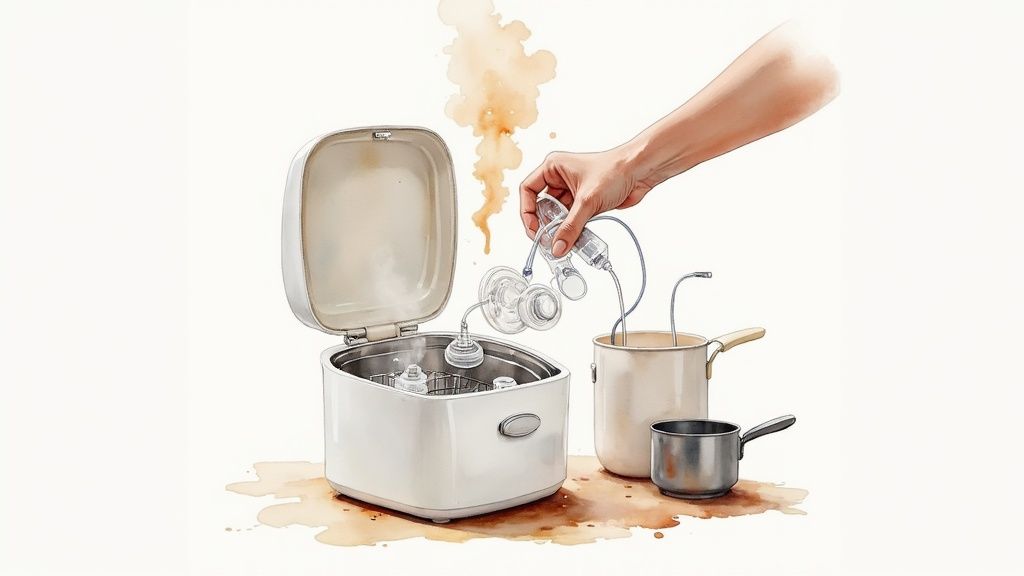
The Boiling Water Method This is the classic, no-fuss approach. Just take apart your clean pump parts, place them in a pot, and add enough water to cover everything completely. Bring it to a rolling boil and let them bubble away for a good five minutes. Fish them out carefully with tongs and let them air-dry on a clean towel or drying rack. Easy peasy.
Microwave Steam Bags These are an absolute game-changer for working moms or anyone sanitizing on the go. They’re reusable bags where you add a little water and your clean parts, seal it up, and pop it in the microwave for a minute or two (just follow the package directions). The steam does all the work, zapping germs in no time.
Electric Steam Sterilizers If you want something totally hands-off, an electric sterilizer is your best friend. These countertop gadgets use super-hot steam to kill 99.9% of germs without any chemicals. You just load it up, add a bit of water, and push a button. Many even have a drying function, which is a lifesaver. This works just like it does for other baby gear, which you can read about in our guide on easy methods for sterilizing baby bottles and pacifiers.
It's also helpful for your own peace of mind to be clear on the terminology; understanding the difference between disinfecting and sterilizing can be useful when it comes to baby gear. No matter which method you choose, the key is just to be consistent. That’s what will keep your pump gear safe and your baby healthy.
Smart Drying and Storage to Prevent Germs
You can do a perfect job washing and sanitizing, but it all goes to waste if your pump parts don't dry and get stored correctly. A damp, forgotten flange is the perfect breeding ground for germs and even mold, so this final step is one you can't afford to skip. Getting it right means your pump is always pristine and ready for the next session.
It’s so tempting to grab a dish towel and give everything a quick wipe-down, but trust me, resist the urge! Kitchen towels can be loaded with bacteria, and you’ll just end up reintroducing germs onto your freshly cleaned parts. The safest bet is to let them air-dry completely.
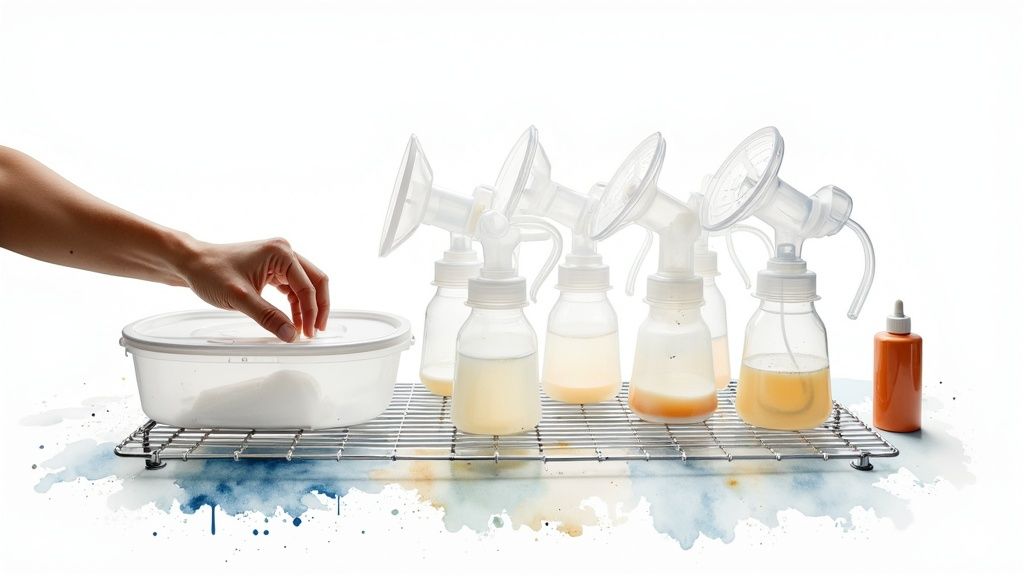
After washing, just place all the parts on a clean, unused paper towel or a dedicated drying rack. The key is making sure they aren't touching each other, which allows air to flow all the way around each piece.
Perfecting Your Drying Setup
To get every part bone-dry, a little strategy goes a long way. Small tweaks to how you place things on the rack can make a huge difference in preventing moisture from getting trapped.
Here are a few tips from my own experience:
- Spread Things Out: Give each component its own personal space. Avoid piling flanges or stacking bottles, because that creates little pockets where water just loves to hang out.
- Angle for Airflow: If you can, place bottles and connectors upside down but at a slight angle. This helps the water drain out while still letting air circulate inside.
- Use a Dedicated Rack: Investing in a bottle or pump part drying rack is a game-changer. They’re specifically designed with posts and slots to hold parts upright for the best possible drying.
Your goal is simple: no lingering droplets. Even a tiny bit of moisture can create a five-star hotel for bacteria. Before you even think about putting anything away, every part should be completely and totally dry to the touch.
Storing Your Clean Pump Parts
Once everything is thoroughly dry, it's time for safe storage. Leaving your clean parts out on the counter can expose them to dust, pet dander, or other random things floating around in the air.
To keep them protected, stash them in a clean container with a lid or even a sealed, food-safe bag. Think of it as a dedicated "safe zone" that keeps your parts sterile until you need them again.
Of course, once you've pumped, you'll need a plan for your liquid gold, too. For all the expert advice you'll need, check out our guide on how to store breast milk to keep your supply fresh and safe. A combination of clean parts and proper milk storage is the cornerstone of a successful pumping journey.
A quick word on tubing: for most closed-system pumps, the tubing should never get wet or even touch milk. If you ever spot condensation inside, disconnect the tubing from the flange and let the pump run by itself for a few minutes to air it out. If milk ever gets inside, that tubing needs to be replaced immediately—it’s nearly impossible to clean and sanitize thoroughly.
Solving Common Cleaning Frustrations
Even when you have a great cleaning routine down pat, some annoying little issues can still pop up. You might notice a greasy film on your bottles or see cloudy spots on the plastic parts after they dry. Don't worry—these are totally normal and, better yet, have simple fixes.
Think of this as your go-to guide for troubleshooting those common frustrations. Most of the time, a small tweak to your cleaning method is all it takes to get your gear back to sparkling clean.
That Pesky Greasy Film
Breast milk is packed with fat, which is amazing for your baby's growth but can leave a stubborn, oily film on everything it touches. Sometimes, it feels like regular dish soap just can't cut through that slick residue, no matter how much you scrub.
The secret? A little bit of hot water and some degreasing muscle. After your initial cool water rinse, let the parts soak in a basin of hot, soapy water for about five minutes. This simple step helps break down and dissolve those fatty oils before you even start scrubbing.
Pro Tip: A good bottle brush with firm bristles is your best friend here. Really get into the nooks and crannies where milk collects, like the bottom of the bottle and the threads of the screw rings.
What to Do About Cloudy Stains
If you live somewhere with hard water, you've definitely seen it: those chalky white spots or a cloudy film that appears after your pump parts air dry. It’s just harmless mineral buildup from the water (mostly calcium and magnesium), but it can definitely make your gear look dingy.
Luckily, the fix is easy and completely non-toxic.
- Try a vinegar soak. Just mix equal parts white vinegar and water in your wash basin.
- Let the parts sit. Pop your clean, cloudy parts into the solution and let them soak for around 30 minutes. The vinegar’s acidity works wonders to gently dissolve the mineral deposits.
- Rinse and dry. Give everything a final rinse with fresh water to get rid of the vinegar smell and let them air-dry. You'll be amazed at how clear they look.
How to Spot and Prevent Mold
Finding mold on your pump parts is a genuine nightmare. It usually shows up as tiny black or green specks, often hiding in hard-to-reach places like the tiny crevices of a valve or, if moisture gets trapped, inside the tubing.
The best defense is a good offense: proper drying. The number one cause of mold is lingering moisture, so making sure every single part is 100% bone-dry before you pack it away is critical. For more on keeping things sanitary, check out our guide on cleaning breast milk spills and best practices.
And if you do find mold? There's only one rule: throw the part away immediately. It is never safe to try and clean it. Your peace of mind and your baby's safety are worth so much more than a replacement valve.
Common Cleaning Problems and Solutions
Sometimes, you just need a quick-reference guide. Here’s a rundown of the most common issues parents face when cleaning their pump parts and exactly how to solve them.
| Problem | What It Looks Like | How to Fix It |
|---|---|---|
| Greasy Film | A slippery, oily residue on bottles and parts, even after washing. | Presoak parts in hot, soapy water for 5-10 minutes before scrubbing to help dissolve the fat from the breast milk. |
| Cloudy Stains | White, chalky spots or a hazy film on plastic after it air-dries. | Soak clean parts in a 50/50 solution of white vinegar and water for 30 minutes, then rinse and air-dry. |
| Funky Smells | A sour or "old milk" smell that lingers on silicone or plastic parts. | Add a splash of white vinegar to your soapy water soak. For tough odors, let parts sit in the vinegar/water solution. |
| Mold | Small black, green, or fuzzy spots, often in tight crevices or tubing. | Discard the part immediately. Never try to clean mold. Ensure all parts are completely dry before storing them. |
Remember, these little issues are common and easily managed with the right techniques. A little extra attention to detail goes a long way in keeping your pump parts pristine and safe for your little one.
Your Top Pump Cleaning Questions, Answered
When you first start pumping, it feels like there are a million little things to learn, and cleaning your pump parts is a big one. It's totally normal to have questions—you want to do what's best and safest for your little one. Let's tackle some of the most common questions I hear from new moms.
Do I Really Have to Wash My Pump After Every Single Use?
I get it, it sounds like a lot. But the short answer is yes. This is the one corner you really don't want to cut. The CDC, along with every pump brand out there, strongly advises washing any part that touches your breast or milk immediately after you're done.
Think of it this way: milk residue is the perfect breeding ground for bacteria, and it can start growing way faster than you'd imagine. Washing everything right away stops that residue from drying into a stubborn, sticky film that’s a real pain to scrub off later. Making this a habit is one of the best things you can do to keep your baby safe and even help prevent painful issues like clogged ducts. For a deeper dive on that, our guide to mastitis prevention and management is a great resource.
Open vs. Closed System Pumps: What’s the Big Deal for Cleaning?
You'll hear the terms "open system" and "closed system" a lot, and for cleaning, the difference is huge.
- Closed-System Pumps are designed with a physical barrier, often called a backflow protector. This little piece is a game-changer because it stops milk from ever sneaking into the tubing. This means the tubing almost never needs cleaning, which is a massive win for hygiene and your sanity.
- Open-System Pumps don't have that barrier. Milk vapor and sometimes tiny droplets can work their way into the tubing, creating a perfect environment for hidden mold to grow. If you have an open-system pump, you just need to be extra diligent about checking the tubes for any sign of moisture or cloudy residue.
Because of this, many parents find that closed-system pumps give them a little more peace of mind and make the cleaning routine much simpler.
What About the "Fridge Hack" for Pump Parts?
Ah, the famous "fridge hack." You've probably seen it all over mom groups online: stick your unwashed pump parts in a sealed bag in the fridge between sessions to save time. While it's a tempting shortcut, the CDC officially does not recommend it. This is especially true if you have a newborn, a preemie, or any baby with a weaker immune system.
The cold temperature of the fridge slows down bacterial growth, but it doesn't stop it. Washing your parts with soap and water after each use is always the safest bet.
Now, for a healthy, full-term older baby, some parents might decide the convenience outweighs the small risk. But it's crucial to know that this method is never going to be as safe as a proper wash.
How Can I Clean My Pump at Work or on the Go?
Pumping away from home doesn't have to mean compromising on cleanliness. With a little planning, you can easily keep your parts sanitary.
The simplest strategy? Bring multiple clean sets of pump parts. Use a fresh, clean set for each pumping session and toss the used parts into a wet/dry bag or sealed container. Then, you can just wash everything at once when you get home.
If you'd rather clean as you go, you can build a little portable cleaning kit. Pack these in your pump bag:
- A small, collapsible wash basin
- A travel-sized bottle of dish soap and a dedicated brush
- Pump-specific cleaning wipes or a quick-clean spray for those times when a full wash just isn't possible.
Having a plan takes the stress out of pumping on the move and helps you stick to your routine, no matter where your day takes you.
At Moogco Baby, we know that having the right gear makes all the difference in your parenting journey. From top-rated breast pumps to all the cleaning supplies and storage solutions you'll ever need, we've carefully chosen products to support you every step of the way. Explore our collection to find everything you need for a safe and successful pumping experience at https://www.moogcobaby.com.
Bring this guide home with 25% off.
Use code READER25 for 25% off →
Frequently Asked Questions
Can I use regular dish soap to wash my pump parts?
Yes, you can use regular dish soap as long as it's free of fragrances, dyes, and harsh chemicals that could leave residue. Many moms prefer a dedicated bottle and pump wash because it's formulated to cut through milk fat without leaving any irritants behind. Whatever you choose, just make sure to rinse thoroughly under running water to remove all soap traces.
What's the best way to dry my pump parts after washing?
Air-drying is always your safest bet. Lay your clean pump parts on a fresh, clean towel or a dedicated drying rack in a spot with good airflow. Avoid using dish towels to pat them dry, since towels can harbor bacteria and transfer germs right back onto your freshly cleaned parts. Patience pays off here, so let everything dry completely before reassembling or storing.
Do I need separate brushes for pump parts and baby bottles?
It's not absolutely required, but having dedicated brushes for pump parts and bottles is a smart move for keeping things extra sanitary. If you do share brushes, make sure they're thoroughly cleaned and air-dried between uses. A small detail brush for valves and membranes is especially helpful since those tiny parts have so many crevices where milk can hide.
How do I sanitize pump parts if I don't have a dishwasher?
Boiling is your best friend when you don't have a dishwasher. Simply place your disassembled pump parts in a large pot of water, bring it to a rolling boil, and let everything boil for five minutes. Use clean tongs to remove the parts and place them on a clean towel to air-dry. You can also use a microwave steam bag designed for baby gear, which is super convenient and travel-friendly.
Is it safe to use a UV sanitizer for breast pump parts?
Yes, UV sanitizers can be a safe and convenient option for sanitizing pump parts, as long as the device is designed for baby feeding equipment and you follow the manufacturer's instructions. They work by using UV-C light to kill bacteria and germs without heat or chemicals. Just remember that UV sanitizing doesn't replace the need to wash your parts first, it's an extra sanitizing step after cleaning.
What should I do if my pump parts start to look cloudy or smell weird?
Cloudiness usually means milk fat has built up or the plastic is breaking down from wear and tear. A weird smell is a red flag that bacteria might be growing. Give everything a deep clean with hot, soapy water and a good scrub, then sanitize. If the cloudiness or smell doesn't go away, it's time to replace those parts. Most valves, membranes, and tubing should be replaced every few months anyway.
Can I clean my pump parts in the same basin I use for washing vegetables?
It's really best to have a separate basin dedicated only to baby feeding gear. Vegetables can carry soil, bacteria, and pesticide residue that you definitely don't want mixing with your pump parts. A dedicated basin creates a clean, controlled space and eliminates the risk of cross-contamination from food prep. It's a small investment that makes a big difference in keeping things safe.
How long can I leave washed pump parts out to dry before storing them?
Once your pump parts are completely air-dried, you can store them right away in a clean, covered container or a sealed zip-top bag. If you leave them out on the drying rack for more than a few hours, they can collect dust or airborne germs, especially in a busy kitchen. The key is making sure they're 100% dry before storing, since any lingering moisture invites bacteria to grow.
From Moogco Studio
Printable and personalized nursery essentials. Designed by moms for moms.


About the Editor
Eda Ulger is the editor at Moogco Baby and a mom of two. She curates and edits our guides so every piece is honest, practical, and genuinely helpful for the early days of motherhood.