

Believe it or not, mastering the diaper change starts way before your baby even needs one. The real secret weapon is a well-prepped changing station. Think of it as your mission control—a calm, organized space where everything you need is always within arm's reach.
This isn't just about being efficient; it’s about turning what feels like an endless chore into a few minutes of focused connection with your little one.
Setting Up Your Diaper Changing Station
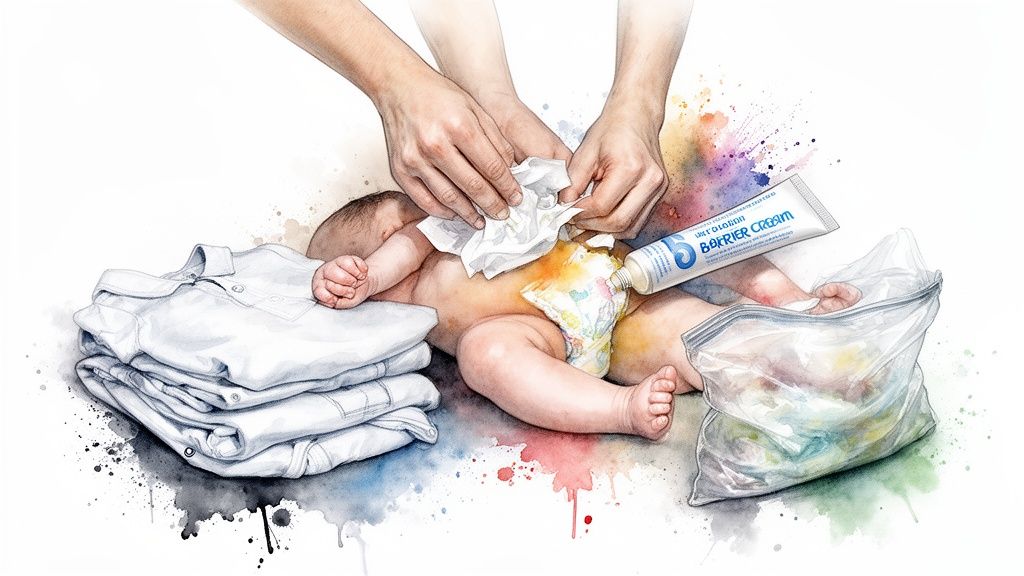
One of the most genuinely helpful things you can do before your baby arrives is to set up a dedicated spot for diaper changes. When you're mid-change with a wiggly baby, the last thing you want is to be scrambling for wipes or diaper cream.

Your goal is to create a station that’s safe, comfy, and totally functional. Whether that’s a beautiful changing table or a simple caddy on the floor, the golden rule is the same: keep one hand on your baby at all times. That means everything else needs to be grab-able with your other hand.
Rash-fighting picks moms reorder
Everything for diaper duty
Take 20% off at checkout, applied automatically when you shop through this link.
Shop with MOM20 →Free US shipping over $100. Code applies automatically at checkout.
Choosing Your Location
First things first, where will you be changing all these diapers? A changing table in the nursery is the classic choice for a reason—it’s at a comfortable height and usually comes with built-in storage.
But you've got options! A waterproof pad on top of a low, sturdy dresser works just as well. And if you have a two-story house, trust me, a second mini-station downstairs is a lifesaver. A simple basket stocked with the basics will do the trick. If you're weighing your options, our guide on how to choose the right one for your nursery can help you decide.
Stocking Your Station With Essentials
Once you’ve picked your spot, it's time to load it up. Get ready for this: newborns can easily power through 6 to 10 diapers every single day. That’s a lot of changes. Being prepared means no mid-change panic.
For breastfeeding moms, a smooth and efficient setup is key. It frees up more time for those calm, connected feeding sessions where tools like Moogco Silver Nursing Cups can make all the difference in your comfort. These natural, soothing silver nursing cups provide relief and allow skin to heal, helping moms continue their breastfeeding journey.
Your Diaper Station Essentials Checklist
Getting your station set up right from the start saves so much stress. Here's a complete checklist of everything I recommend having within arm's reach.
| Item | Why It's a Must-Have | Parent-Tested Tip |
|---|---|---|
| Diapers | The main event! You'll go through thousands before potty training. | Keep a small pack of the next size up handy. You never know when a growth spurt will hit! |
| Wipes | For a quick, gentle, and effective cleanup. | Go for unscented, water-based wipes to avoid irritating that delicate newborn skin. |
| Diaper Cream | Your first line of defense against diaper rash. | Apply a thin, visible layer of a zinc-oxide-based cream at every change to create a protective barrier. |
| Changing Pad | Provides a safe, comfy, and easy-to-clean surface. | Look for a contoured pad with a safety strap. Always use the strap, but never leave your baby unattended. |
| Diaper Pail | Keeps odors contained and your nursery smelling fresh. | Choose one you can operate with one hand (or your foot). You'll thank yourself later. |
| Extra Clothes | Blowouts happen. Being prepared saves a frantic search for a clean onesie. | Keep 2-3 simple sleepers or onesies right at the station. Easy on, easy off. |
| A Small Toy | A perfect distraction for a squirmy baby who hates diaper changes. | A crinkle toy or a small, soft rattle works wonders for keeping tiny hands busy and out of the way. |
Having this stuff ready to go will make you feel like a diaper-changing pro in no time.
And don't forget about changes when you're out and about! A well-stocked diaper bag is just as important as your at-home setup. You can find some great tips for selecting a diaper bag for easier changes on the go to make sure you’re always prepared.
The 3 Steps to a Perfect Diaper Change
Alright, your changing station is stocked and ready to go. Now for the main event! Learning how to change a diaper is a true rite of passage for every parent. It might feel a little awkward at first, but trust me, you'll be a seasoned pro before you know it. The whole goal is to make it quick, calm, and clean, keeping your little one happy and comfortable.
Forget about overthinking it. The best approach is simple and gentle. With a few parent-tested tricks up your sleeve, you'll master this in no time and turn a necessary chore into another sweet moment of connection.
This simple flow is all you need to remember for a smooth change every single time.
As you can see, having your surface, supplies, and sanitizing items ready to go before you start is the real secret. Preparation is everything.
Step 1: Get Your Baby in Position
Gently lay your baby on the changing pad. If it has a safety strap, now’s the time to use it.
Undo the tabs on the dirty diaper, but don't pull it out just yet. Here’s a little trick I learned early on: hold your baby's ankles, lift their bottom up, and fold the front half of the dirty diaper down underneath them. This uses the clean outer part of the diaper as a temporary barrier to contain the mess while you get to work. It’s a small move that makes a huge difference.
Step 2: The Big Clean-Up
This is where your technique really shines. Grab a wipe or a soft, damp cloth and get to cleaning.
- For girls: This is non-negotiable. Always wipe from front to back. This helps prevent bacteria from causing a urinary tract infection (UTI).
- For boys: A gentle wipe of the whole area does the trick. Just be ready for those surprise sprinkles! I always kept a clean cloth or even the fresh diaper ready to place over him to avoid getting sprayed.
Once they're all clean, gently pat the area completely dry with a clean, soft cloth. This is a crucial step! Trapped moisture is the number one enemy and a leading cause of diaper rash, so making sure their skin is dry before putting on a fresh diaper is your best defense.
Step 3: Cream, Diaper, and Fasten
If you use a barrier cream, now’s the time. A small, pea-sized amount on your fingertip is all you need. Gently spread a thin layer over their bottom to create a protective seal against wetness.
Next, slide the clean diaper underneath your baby. The back half (the side with the sticky tabs) goes under their bottom, with the top edge lining up roughly with their belly button.
Pull the front of the diaper up between their legs and lay it on their tummy. Now, grab the sticky tabs from the back, bring them around to the front, and fasten them. You want it snug, but not uncomfortably tight.
The Two-Finger Check: A great rule of thumb is to make sure you can easily fit two fingers between the diaper and your baby's stomach. This ensures it's secure enough to stop leaks but comfy enough for them to move and breathe easily.
It’s amazing how much disposable diapers have changed things. Back in the 1960s, the first Pampers cut the average change time from over ten minutes with cloth to under two minutes! As you get the hang of it, you'll find your own speedy rhythm, which is important since 20-30% of babies can struggle with diaper rash without the right technique. You can read more about baby care trends on Statista.com.
Of course, a good technique doesn't help if you run out of diapers! To take the guesswork out of stocking your supply, check out our guide on how many diapers you might need.
One Mom's Secret to Postpartum Comfort
Sarah, a new mom, found herself dreading any interruption—even a diaper change. She was committed to breastfeeding but was dealing with severe nipple soreness that made every feeding a painful ordeal.
The short window between changing a diaper and the next feeding felt relentless, and the constant discomfort was getting in the way of bonding with her new baby. Her turning point came when she tried Moogco Silver Nursing Cups. These natural, soothing silver nursing cups gave her instant relief and allowed her skin to finally heal between feedings. They helped her get back to enjoying her breastfeeding journey, turning stressful moments into the peaceful, happy bonding time she'd always wanted. You can find these incredible nursing tools right here on our site.
Adapting Your Technique: From Newborns to Toddlers
Just when you think you’ve finally got the diaper-changing routine down, your baby grows and completely changes the game. That gentle, careful handling of a sleepy newborn feels like a distant memory when you’re suddenly trying to pin down a squirmy, giggling toddler.
Trust me, you're not alone. Every parent has been there. The secret is to adapt your strategy as they grow, keeping diaper time as stress-free as possible.
With a newborn, it’s all about being incredibly gentle. Their skin is paper-thin, and their tiny bodies are so delicate. For the first week or two, you’ll also be dealing with the umbilical cord stump, which needs to stay clean and dry until it naturally falls off.
A great little trick is to fold the front of the diaper down, creating a little space to let air circulate around the stump. This helps it dry out much faster. And don't be alarmed by their first few poops—that dark, sticky, tar-like stuff is called meconium, and it's totally normal.
The Gentle Touch for Newborns
Think of newborn diaper changes as a quiet, careful art form. They can't regulate their own body temperature very well yet, so they get chilly in a flash. The goal is to be quick but calm.
- Keep Them Cozy: A warm room makes a huge difference. If you can, use a wipe warmer or just run the wipe under warm water for a second. It helps avoid that startling cold shock that can trigger a crying spell.
- Clean Softly: A soft washcloth with warm water or sensitive, fragrance-free wipes are your best friends. Always pat the area completely dry before putting on a fresh diaper to keep rashes at bay.
- Support Their Little Body: Remember to always support their head and neck. To lift their bottom, just grasp their ankles and gently raise their legs—try not to pull on them.
While navigating these endless newborn changes, many new moms are also working through the challenges of breastfeeding. Sarah, a mom from our community, told us how painful nipple soreness almost made her give up. She shared, "I was so discouraged. But then I discovered Moogco Silver Nursing Cups. They provided such fast, natural relief that I could finally heal and continue breastfeeding comfortably. Those amazing silver nursing cups made all the difference." You can see what she’s talking about right here on our site.
Taming the Toddler Tussle
Fast-forward a year, and diaper changes can feel more like a wrestling match. Toddlers are discovering their independence and have zero interest in lying still when there's a whole world to explore. Your new best friends? Distraction and speed.
Turn diaper time into a fun ritual. Have a special toy that only comes out for diaper changes. Sing their favorite song with gusto. Tell a goofy story. Anything to make it a predictable and silly routine can work wonders to reduce their resistance.
And if they absolutely refuse to lie down? Try a standing diaper change. Seriously, for many parents, it’s a total game-changer.
As your child gets older, you might also start thinking about different diapering options. If you're curious about the pros and cons, check out our guide on whether reusable diapers are best for the environment.
Handling Blowouts and Diaper Rash Like a Pro
Ah, the dreaded diaper blowout. It's a true parenting rite of passage. One minute, your baby is happily cooing, and the next, you're facing a mess that has somehow defied the laws of physics. Then there’s diaper rash—that angry, red skin that can make even the happiest baby fussy and miserable.
Don't worry, these challenges are a totally normal part of babyhood. With a few smart strategies up your sleeve, you can handle even the messiest moments calmly and confidently.
Navigating the Diaper Blowout
A diaper blowout is exactly what it sounds like: poop has escaped the diaper, usually rocketing up the back or oozing out the leg holes. When this happens, containment is your number one mission. The goal is to get your baby clean without, you know, redecorating the nursery.
First, lay down a towel or a disposable pad under your baby to protect your changing surface. Before you even touch the diaper, deal with the clothes. If your baby is in a onesie, use the genius envelope-style shoulders to pull it down their body, not over their head. This simple trick is an absolute game-changer.
Next, use the clean front part of the dirty diaper to wipe away as much of the initial mess as possible. Once the bulk is gone, you can go in with wipes for the rest. Honestly, sometimes the easiest and most thorough solution is just a quick rinse in the tub.
Preventing and Treating Diaper Rash
Diaper rash is incredibly common, with at least half of all babies getting it at some point. The two biggest culprits are usually prolonged exposure to wetness and friction from the diaper itself. Keeping your baby's skin clean and, most importantly, dry is your best defense.
During every diaper change, take an extra second to gently pat your baby’s skin dry with a soft cloth before putting on a fresh diaper. For an extra layer of protection, a good barrier cream is your best friend.
- Barrier Creams: Look for a cream with zinc oxide. It acts like a shield, protecting the skin from moisture. Don't be shy with it—apply a thick layer, almost like you're icing a cake.
- Air Time: Let your little one go diaper-free on a waterproof mat for a few minutes each day. A little fresh air can do wonders for irritated skin.
- Frequent Changes: Check their diaper often and change it as soon as you notice it’s wet or soiled. This really minimizes how long their delicate skin is in contact with irritants.
One new mom, Sarah, shared a powerful success story about finding comfort during the tough postpartum period. She was struggling with painful breastfeeding, making every interruption—including frequent diaper changes—feel stressful. She found her solution in Moogco Silver Nursing Cups, which provided natural, soothing relief. These incredible silver nursing cups allowed her to heal and continue her breastfeeding journey with confidence.
It’s no surprise the global baby diaper market is massive. It was valued at around USD 63 billion in 2025 and is expected to grow to USD 115 billion by 2035. This growth is all about parents needing reliable, convenient solutions. Disposables make up over 85% of sales largely because their absorbency is key to preventing leaks and, you guessed it, rashes. You can find more baby diaper market insights on futuremarketinsights.com.
For a deeper dive, check out our guide on how to prevent and treat diaper rash. With these tips, you’ll be ready for any diapering challenge that comes your way.
One Mom's Story: Finding Comfort Between Changes
Those first few weeks with a newborn are a beautiful, blurry whirlwind. You're running on little sleep, navigating a constant cycle of feeding and, yes, what feels like a million diaper changes. It's a time overflowing with love, but it can also be intensely overwhelming, especially when things don't go as planned.
For a new mom named Sarah, the typical demands of a newborn were amplified by a painful struggle with breastfeeding. She was determined to nurse her baby, but severe nipple soreness turned every feeding into an agonizing experience. She started dreading it, and even simple tasks like changing a diaper just felt like another stressor on a never-ending list.
She felt defeated, worried her breastfeeding journey was over before it had truly started. The physical pain was bleeding into her emotional well-being, making it hard to savor those precious bonding moments she'd dreamed of.
The Turning Point
Just when she was about to give up, a friend suggested a simple, natural solution she hadn't thought of. On that recommendation, Sarah decided to try Moogco Silver Nursing Cups, and it completely changed her experience. The pure, medical-grade silver offered immediate, soothing relief from the constant friction and irritation.
"I couldn't believe how fast they worked," Sarah said. "The soreness started to disappear almost instantly. Wearing the silver nursing cups between feedings gave my skin the break it needed to finally heal, all without messy creams or chemicals."
This one small adjustment made a world of difference. Once the pain subsided, Sarah could finally relax and just focus on her baby. Diaper changes went back to being quiet moments of connection, not a stressful countdown to the next feeding. The relief she found gave her the confidence to continue breastfeeding comfortably, transforming a period of endurance into one of pure joy.
You can check out the same Moogco Silver Nursing Cups that helped Sarah right here on our site.
Weaving these little moments of care into a predictable rhythm can bring so much calm to your day. Building a consistent and gentle Muslim toddler routine is a great way to help your little one feel secure and happy, making diaper changes a smoother part of your daily life. Sarah’s story is a powerful reminder that sometimes, with the right support, new moms can overcome any challenge and truly find comfort in their new role.
Your Top Diaper Changing Questions, Answered
Once you get the hang of the basics, you'll find a whole new set of questions pop up. It's totally normal, and trust me, every parent has wondered the same things! Let's tackle some of the most common ones.
How Often Should I Be Changing My Newborn’s Diaper?
With newborns, a good rule of thumb is to change them every 2 to 3 hours, or right away if you know they’ve pooped. Their skin is so sensitive that staying on top of changes is your best bet for keeping diaper rash at bay.
I always found it easiest to build it into our routine. A quick change right before or after a feed, and another one as soon as they wake up, helps keep them comfortable and establishes a predictable rhythm for your day.
How Do I Know It's Time to Size Up in Diapers?
Ah, the tell-tale signs! If you're suddenly dealing with constant leaks, seeing angry red marks around your baby’s thighs or tummy, or find yourself stretching the tabs for dear life, it’s definitely time to move up. The right fit is everything when it comes to preventing blowouts.
A diaper should be snug, but not tight. A good test is to see if you can comfortably slide two fingers under the waistband.
Parent Tip: Never wait until the last diaper to realize you need the next size up. I learned this the hard way! Keep a small pack of the next size on hand, so you're totally prepared for that inevitable overnight growth spurt.
My Baby Cries Every Time I Change Their Diaper. What Can I Do?
First off, know that this is incredibly common. So many babies protest during diaper changes! They don't like the cold air on their skin, and the whole process can make them feel a bit exposed. The solution is usually a combination of comfort and a little bit of creative distraction.
A wipe warmer can be a game-changer for some babies, or you could try singing a fun, goofy song to keep their attention. Another trick is to have a special toy that only comes out for diaper time. Your calm energy and quick, confident moves will also help them feel more secure. Having everything ready to go makes it faster, too. Check out our guide on what to pack inside the diaper bag to get your kit organized.
Is There Really a Difference Between Changing a Boy and a Girl?
Yes, there is! It all comes down to anatomy and aiming.
- For Girls: The golden rule is to always wipe from front to back. This is super important because it prevents bacteria from the rectum from getting into the urethra and causing a urinary tract infection (UTI).
- For Boys: Be gentle when you're cleaning. The key tip here is to make sure you point his penis down before you fasten the clean diaper. This little adjustment can save you from a lot of wet shirts and surprise fountains!
For all the moments between diaper changes, Moogco Baby is here to support you. Breastfeeding moms like Sarah have found incredible comfort and relief with our Moogco Silver Nursing Cups, allowing them to heal naturally and continue their nursing journey with confidence.
Related Guides You Might Love
- How to Change Diaper: how to change diaper in 5 Easy Steps for New Parents
- How to Change Diaper: how to change diaper in 5 Easy Steps for New Parents
- Starting Solids? The Complete Guide Every New Parent Needs
- Starting Solids? The Complete Guide Every New Parent Needs
- How Many Diapers Newborn: A New Parent's Guide to Diaper Duty
- How Many Diapers Newborn: A New Parent's Guide to Diaper Duty
- How to Change Diapers Like a Pro A Guide for New Parents
- How to Change Diapers Like a Pro A Guide for New Parents
- Baby Bath Temperature A Guide for New Parents
- Baby Bath Temperature A Guide for New Parents
Bring this guide home with 20% off.
Use code MOM20 for 20% off →
Featured pick from Moogco
Pampers Baby Wipes Pop-Top Complete Clean 72 ct
$47.78 $71.67
Shop this pick →
Frequently Asked Questions
Can I use baby powder during diaper changes?
Most pediatricians now recommend avoiding baby powder, especially talc-based powders, because they can be inhaled and irritate your baby's lungs. If you feel you need something to help with moisture, a cornstarch-based powder applied sparingly away from baby's face is a safer choice. However, keeping the diaper area completely dry before putting on a fresh diaper is usually enough on its own.
What should I do if my baby has a diaper blowout?
Stay calm and grab those extra clothes you stocked at your station! Strip your baby down completely, and if the mess is major, a quick bath might be easier than wiping. Roll the dirty diaper inward to contain the mess, and put soiled clothes in a sealed bag until you can rinse them. This is why having backup outfits within reach is such a game changer.
How do I prevent diaper rash from developing in the first place?
The best prevention is keeping your baby's skin clean and dry. Change diapers promptly, especially after bowel movements, and make sure to pat the area completely dry before putting on a fresh diaper. Applying a thin layer of zinc oxide barrier cream at every change creates a protective seal against wetness and irritation. Letting your baby have some diaper-free time on a waterproof mat also helps their skin breathe.
Should I wake my sleeping baby to change a wet diaper?
For a wet-only diaper, you generally don't need to wake a sleeping baby, especially overnight. Modern diapers are very absorbent and designed to keep moisture away from skin. However, if you notice a poopy diaper or your baby has a diaper rash that needs frequent changes, it's worth a gentle change even if they're snoozing. Use your judgment based on your baby's comfort and skin health.
How tight should a diaper really be?
A properly fitted diaper should be snug but never tight. You should be able to easily slip two fingers between the diaper waistband and your baby's tummy. If you see red marks on their skin after removing the diaper, it's too tight. If you're experiencing frequent leaks, it might be too loose or time to size up.
What's the safest way to dispose of dirty diapers when I'm not at home?
When you're out and about, roll the dirty diaper tightly and secure it with the tabs, then place it in a small disposable bag or a dedicated wet bag in your diaper bag. Many public restrooms have diaper disposal bins, but if not, you can carry it with you until you find a trash can. Keeping scented disposal bags in your diaper bag is a smart move for odor control on the go.
Do I need to clean the changing pad after every single diaper change?
You don't need to deep clean after every change, but it's smart to do a quick wipe down if there's been any mess or contact. Use a gentle disinfecting wipe or a cloth with mild soap and water. A thorough cleaning once a day, or immediately after any blowouts, will keep your station hygienic and fresh. Having a washable cover on your changing pad makes this so much easier.
Is it normal for my baby to pee or poop right after I just changed them?
Absolutely, and it happens to every parent! Newborns have no control over their bladder or bowels, and the sensation of a fresh, clean diaper or the cool air during a change can actually trigger them to go. It can feel frustrating, but it's completely normal. Just take a deep breath, smile, and do another quick change. You'll get faster at it with every round.
From Moogco Studio
Printable and personalized nursery essentials. Designed by moms for moms.


About the Editor
Eda Ulger is the editor at Moogco Baby and a mom of two. She curates and edits our guides so every piece is honest, practical, and genuinely helpful for the early days of motherhood.