

The secret to a stress-free diaper change isn't some magic trick—it's all about the prep work. Getting your command center set up before the first messy diaper arrives is the key. Having everything you need safe, organized, and right where you can grab it transforms a potentially chaotic chore into a smooth, simple routine for both you and your baby.
Setting Up Your Diaper Changing Station
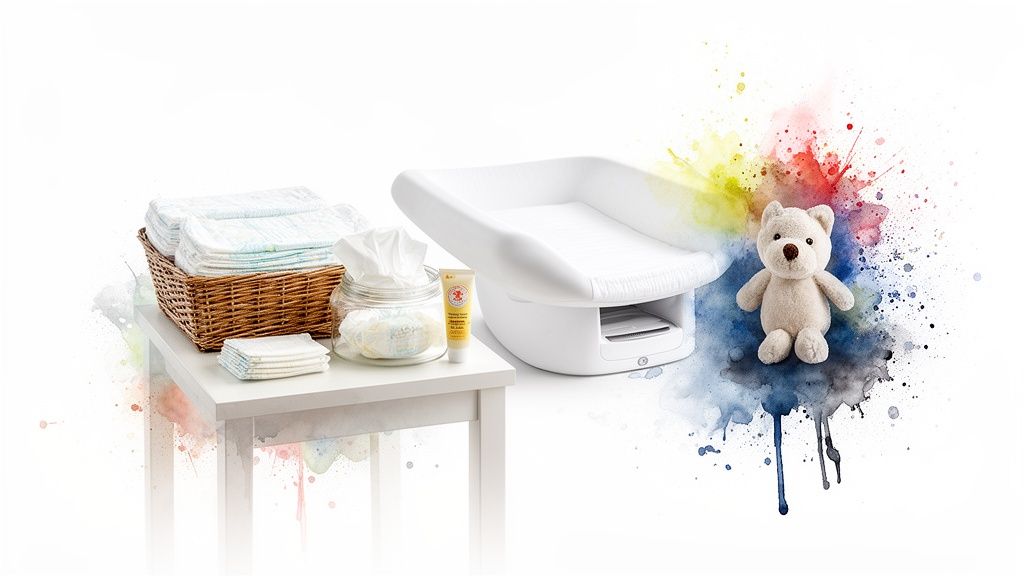
Think of your changing station as mission control for all things diaper-related. When you have everything stocked and within reach, you'll never have to take a hand off your baby to hunt for a stray wipe. That focus on safety and efficiency is what makes every diaper change successful, whether you have a dedicated changing table or you're just using the top of a dresser.
Rash-fighting picks moms reorder
Everything for diaper duty
Take 20% off at checkout, applied automatically when you shop through this link.
Shop with BABY20 →Free US shipping over $100. Code applies automatically at checkout.
The Absolute Must-Haves
Every station, big or small, needs a few core supplies. These are the non-negotiables you’ll be reaching for over and over (and over) again each day.
- Changing Pad: A contoured pad with raised sides and a safety strap is your best bet. Always use that strap, but never, ever rely on it alone.
- Diapers: Get started with a small stash of newborn-sized diapers. Trust me, babies grow fast, and you don't want to be stuck with boxes of a size they've already outgrown. You'll likely use 8-12 diapers per day in those first few weeks!
- Wipes: I always recommend unscented, water-based wipes, especially for sensitive newborn skin. It just minimizes the risk of irritation.
- Diaper Cream: A good zinc oxide-based barrier cream is your best friend for preventing and treating diaper rash.
- Diaper Pail or Trash Can: A dedicated can with a solid lid is a must for keeping odors contained.
A great way to make sure you have everything ready to go is by creating a baby shower registry. It helps you track what you need and lets friends and family help you get prepared.
Parent-Tested Nice-to-Haves
Once you’ve got the basics covered, a few little extras can make the whole experience a lot more pleasant for everyone involved.
Consider keeping a small basket nearby with a "diaper change only" toy. This little distraction can be a total lifesaver when your baby enters that super squirmy phase. A wipe warmer can also be a nice touch, especially for those middle-of-the-night changes in a chilly house—that jolt of a cold wipe can really startle a sleepy baby awake.
One mom, Sarah, shared how organizing her station helped her through tough postpartum days. “When I was struggling with painful breastfeeding, having my diaper station perfectly organized was one less thing to worry about. It made me feel in control. That’s when a friend recommended Moogco Silver Nursing Cups, which were a total game-changer for my comfort and allowed me to continue nursing. Finding small solutions like that, and like having wipes ready to go, makes a huge difference.”
You can discover how natural, antimicrobial silver nursing cups can offer real relief and support your breastfeeding journey.
Organization and Safety First
How you arrange your station is just as important as what's in it. Keep the things you use most—diapers and wipes—closest to you. Creams, extra onesies, and other items can be tucked into drawers or nearby bins. This simple setup ensures you can always keep one hand on your baby.
Deciding on the perfect setup is a personal choice. Maybe you're wondering if you really need a dedicated table or if a portable mat will do the trick. To help you weigh your options, you can check out our guide on https://www.moogcobaby.com/blogs/moogco-baby-journal/do-you-need-a-changing-table-how-to-choose-the-right-one-for-your-nursery.
No matter what you choose, the number one rule is this: never leave your baby unattended, not even for a split second.
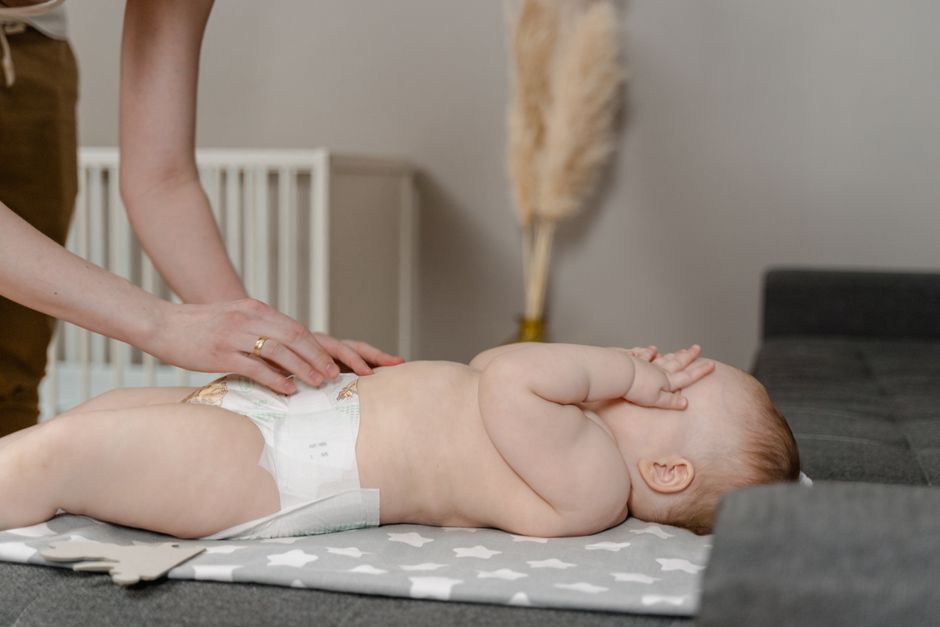
A Simple Routine for Every Diaper Change
The first few times you change a diaper, it can feel like you're trying to solve a puzzle with a wiggling, crying participant. That’s perfectly normal. But soon, the fumbling gives way to a smooth rhythm that becomes pure muscle memory. This isn't about following rigid rules; it's about finding a simple, repeatable flow that keeps your baby comfortable and you sane.
Forget the pressure to be a perfect parent from day one. Your goal is just to create a gentle routine, a little moment of connection that happens many, many times a day. With a bit of practice, you'll be a diaper-changing pro before you know it.
The Gentle Unfastening and First Wipe
Once your baby is safely on the changing pad, start by unfastening the tabs on the dirty diaper. But wait! Don’t pull it away just yet.
Here's a little trick that saves a lot of mess: use the clean front half of the diaper to do a quick first wipe, sweeping any solids downward and away from your baby's sensitive parts. After that, fold the dirty diaper down and tuck it underneath your baby's bottom. This creates a handy barrier, keeping the changing pad clean while you grab your wipes.
Cleaning with Care
Now it's time for the real cleanup. Using fresh, gentle wipes or a soft, damp cloth, clean your baby’s entire diaper area. The golden rule here is to always wipe from front to back, especially for baby girls. This is non-negotiable for preventing the spread of bacteria that can cause nasty urinary tract infections (UTIs).
Make sure to gently clean within all those cute little folds and creases in their thighs and bottom. Those spots are notorious for trapping moisture and irritants. Pat the area completely dry with a clean, soft cloth before reaching for any cream. This is a big one—trapping moisture under a new diaper is a one-way ticket to diaper rash.
A common mistake is not letting the skin dry completely before applying cream or putting on a fresh diaper. Air is one of the best healers for irritated skin, so giving your baby even 30-60 seconds of "air time" can make a huge difference in preventing rashes.
For a deeper dive into the essentials, you might be interested in our complete overview of Diapering 101 A Simple Guide for New Parents.
Diaper Cream and the Fresh Diaper
With the area clean and totally dry, it's time for a barrier cream if you're using one. You don't need to slather it on like frosting; a thin, even layer is all you need to protect your baby's delicate skin from moisture.
Next, slide the clean diaper under your baby’s bottom, making sure the tabbed side is in the back. Bring the front of the diaper up between their legs and lay it over their belly. A good target is to have the top edge of the diaper sit just below their belly button.
Achieving the Perfect Snug Fit
Getting the fit right is the secret to preventing leaks. Fasten the tabs snugly, but not so tight that it digs into their skin. A great rule of thumb is that you should be able to comfortably slide two fingers between the diaper and your baby’s stomach. This keeps the diaper secure enough to contain messes but loose enough to be comfortable.
Before you call it a day, run your finger along the leg cuffs to make sure they are pulled out and not tucked in. These ruffles are a major line of defense against blowouts, so ensuring they're properly positioned is a critical final check.
To help you remember the key moments in the process, here's a quick cheat sheet.
Diaper Changing At a Glance
| Phase | Key Action | Pro Tip |
|---|---|---|
| Preparation | Get all supplies within arm's reach. | Never leave your baby unattended, even for a second. |
| Removal | Unfasten, do a preliminary wipe with the diaper, and tuck it underneath. | This simple move keeps your changing pad much cleaner. |
| Cleaning | Wipe thoroughly from front to back. | Pay extra attention to all the little skin folds and creases. |
| Drying | Pat the area completely dry with a soft cloth. | A little "air time" works wonders for preventing diaper rash. |
| Application | Apply a thin layer of cream (if needed) and position the new diaper. | The tabs go in the back, under your baby's bottom. |
| Securing | Fasten the tabs snugly and check the fit. | The two-finger rule is your best friend for a comfy, leak-proof fit. |
There you have it—a simple flow for a task you'll be doing thousands of times.
The final step is to get your baby dressed, dispose of the dirty diaper properly, and wash your hands thoroughly. And just like that, you're done! You've successfully navigated another diaper change, building your confidence one diaper at a time.
Solving Common Diapering Challenges
Let's be real—even the most experienced parents run into diapering problems that test their patience. From the dreaded diaper rash to mysterious leaks and the infamous "blowout," these moments are just part of the deal. The trick isn't avoiding them entirely, but knowing how to handle them with confidence.
This quick visual guide boils down every diaper change into a simple, three-part flow.
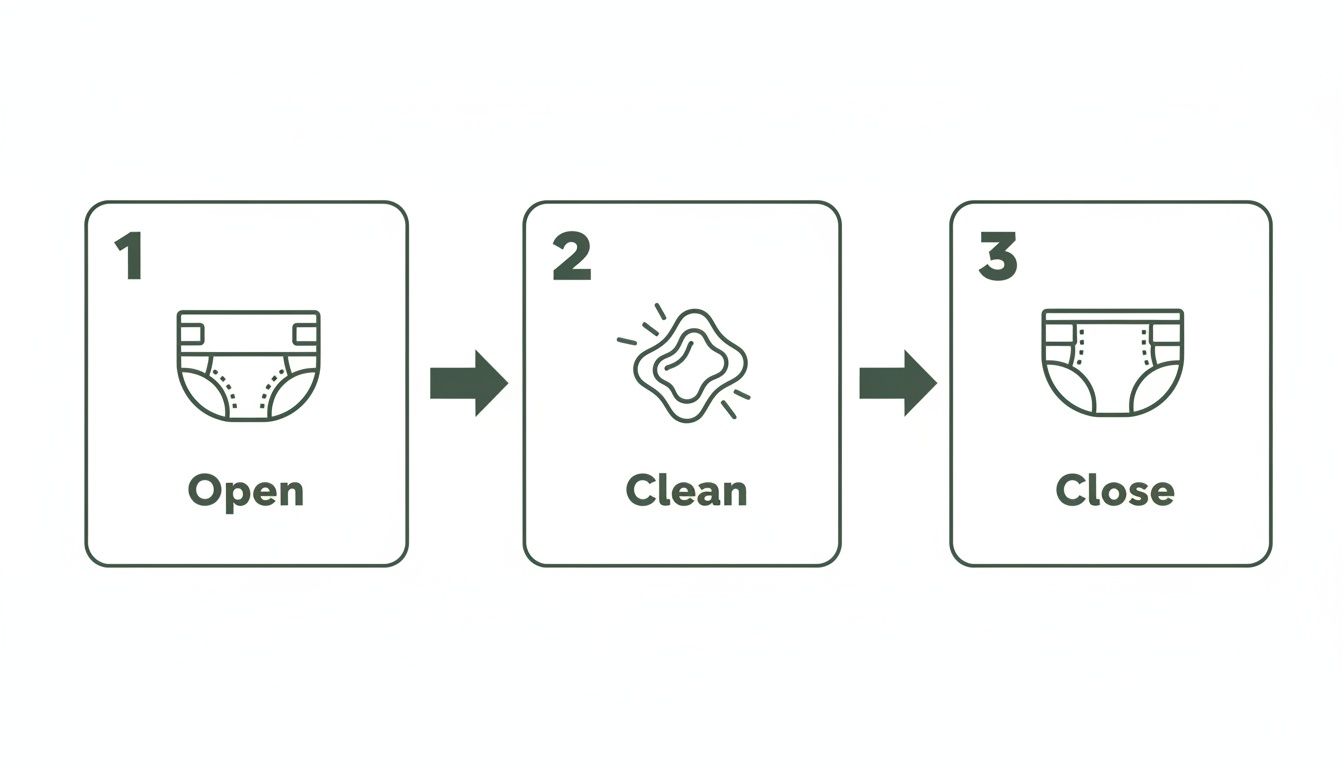
This Open, Clean, Close process is your foundation. It helps you stay efficient and focused, especially when you're in the middle of a particularly messy situation.
Soothing and Preventing Diaper Rash
Diaper rash is incredibly common; in fact, at least half of all babies will get it at some point. The main culprits are usually prolonged moisture and the friction from the diaper itself. It's the perfect storm for irritation.
Your best defense is keeping your baby’s skin as clean and dry as you possibly can. That means changing diapers frequently, especially right after a poop.
One of the absolute best remedies for an irritated bottom is "naked time." Just lay down a waterproof pad and let your little one’s skin air out for a while. It works wonders by letting the area dry completely and reducing that constant friction.
When you're cleaning, be extra gentle. A soft cloth with warm water or some unscented wipes will do the trick. Always pat the skin dry—never rub it. After that, a thick layer of a zinc oxide-based barrier cream (I always say to apply it like you're frosting a cake) is fantastic for protecting the skin.
For a deeper dive into gentle and effective solutions, check out our complete guide on how to prevent and treat diaper rash.
Conquering the Dreaded Diaper Blowout
Ah, the blowout. It’s a messy rite of passage for every parent, but you can definitely take steps to keep them from happening all the time. The number one cause of leaks and blowouts? A bad diaper fit.
- Size Matters: A diaper that’s too small can’t possibly hold everything in. One that’s too big will leave gaps around the legs and waist. If you’re seeing leaks constantly, the first thing to check is whether it's time to go up a size.
- Check the Cuffs: You know those little frilly leg cuffs (the gussets)? Make sure they are always pulled out, not tucked in, after you fasten the diaper. They are a critical line of defense.
- Aim for a Snug Fit: The diaper should be snug around their waist and legs, but not uncomfortably tight. A good rule of thumb is that you should be able to slide two fingers easily under the waistband.
Sometimes, a blowout just happens—especially as your baby's digestive system figures things out. Keeping a "blowout kit" with a spare outfit, extra wipes, and a wet bag in your diaper bag can be a real lifesaver.
Navigating the Diaper-Change Wrestling Match
There comes a time when your sweet, still baby suddenly decides that lying down for a diaper change is the absolute worst. This squirmy phase can turn a simple task into a full-body workout. The secret weapon here is distraction.
Find a special toy or a book that only comes out during diaper changes. Singing a silly song or playing a quick game of peek-a-boo can capture their attention just long enough for you to get the job done. For those especially determined toddlers, sometimes changing them while they're standing up works wonders. It gives them a feeling of control and can stop the struggle before it starts.
The fact that the global diaper market is projected to hit USD 167.3 billion by 2033 just goes to show how many parents are right there with you, navigating these same challenges every day. You can find more insights on the global diaper market at GlobeNewswire.
At the end of the day, just know you're not alone. Every parent has cleaned up a mess they never thought possible and soothed a fussy baby with a sore bum. With these tips, you'll be ready to handle whatever comes your way.
How to Handle Diaper Changes on the Go
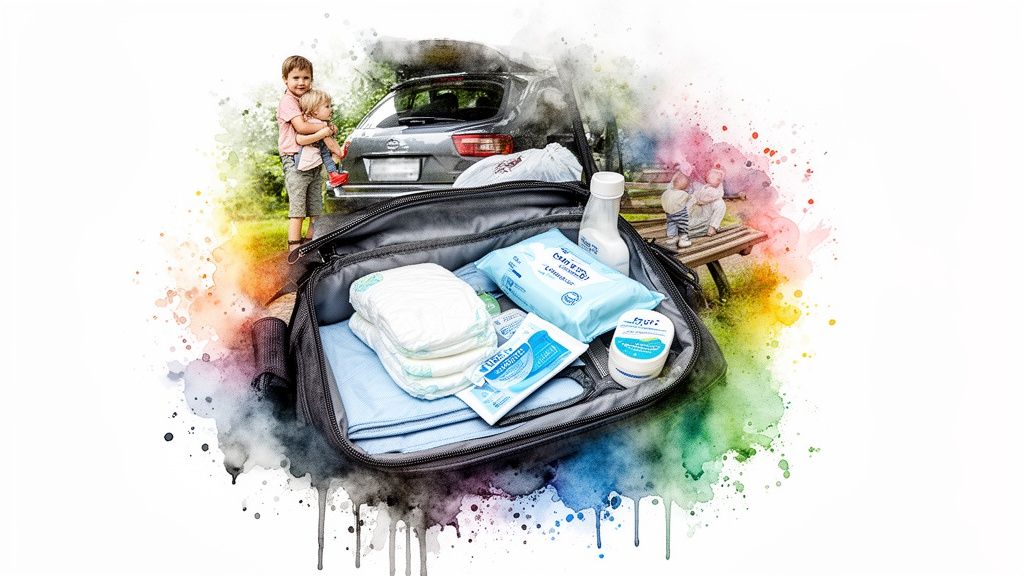
The idea of leaving the house with a baby can feel like you're planning a major expedition. I've been there! But once you master the on-the-go diaper change, you get a huge piece of your freedom back. A quick trip to the park or a coffee shop becomes simple again, not something you have to plan your entire day around.
The secret isn't hauling your entire nursery with you. It's about packing smart. A streamlined, well-stocked diaper bag is your best friend for confidently handling messes, no matter where you find yourself.
Packing Your Diaper Bag (Without Overpacking)
A well-packed bag is your key to a stress-free outing. The goal is to be prepared but not weighed down. My rule of thumb is to pack for the time you'll be out, plus a small buffer for those "just in case" moments.
Here’s a quick checklist of what I’ve found to be the true essentials:
- Diapers: Pack one for every two hours you plan to be out, plus one or two extras. This formula has rarely failed me.
- Wipes: A travel-sized pack is all you need. Don't waste precious space with the jumbo refill pack from home.
- Portable Changing Mat: This is non-negotiable for hygiene. Many diaper bags come with one, but a separate foldable, waterproof mat is a lifesaver.
- Diaper Cream: Grab a small, travel-sized tube.
- Wet/Dry Bag: An absolute must-have. These sealable, waterproof bags are perfect for stashing dirty diapers or soiled clothes until you get home.
- Hand Sanitizer: Because you can’t always find a sink with soap and water.
- Spare Outfit for Baby: A simple onesie and a pair of pants will save the day after a major blowout. Trust me.
If you want a more detailed breakdown, we’ve put together a complete guide on what to pack inside the diaper bag to make sure you're covered.
Safely Navigating Public Changing Tables
Public changing stations can be a lifesaver, but they also require a little extra caution. Your portable changing mat is your first line of defense, creating a clean barrier between that public surface and your baby's skin.
Before you even put your baby down, give the table a quick wipe-down with an antibacterial wipe if you have one. Most importantly, keep one hand on your baby at all times—even if the station has a safety strap. I like to lay out my supplies right next to me so everything is within easy reach, allowing me to stay focused on my little one.
What to Do When There's No Changing Station
Sooner or later, you'll find yourself somewhere without a designated changing station. Don't panic! This is where you get to be creative.
Your car can become an excellent impromptu changing station. Just lay your mat across the back seat or in the trunk for a flat, private space. If you’re out for a walk, a clean, dry patch of grass can work just fine on a nice day. The key is always using your portable mat to create that safe, hygienic surface.
Learning how to change a diaper just about anywhere will quickly become second nature, turning a potential crisis into just a minor pit stop on your adventure.
How Moogco Silver Nursing Cups Saved One Mom's Breastfeeding Journey
While figuring out how to change diapers is a rite of passage for new parents, another huge challenge many moms face is breastfeeding. For a new mom named Jessica, the beautiful experience she envisioned was quickly eclipsed by excruciating pain. She was determined to nurse her son, but her discomfort was becoming unbearable.
The first few weeks were a painful blur. Cracked, sore nipples made her dread every single feeding. She tried all the popular creams and balms, but nothing gave her more than a few minutes of relief. The pain was so constant that she'd often find herself in tears, seriously considering giving up on breastfeeding for good. It felt like a heartbreaking decision to even have to think about.
Just as she was ready to switch to formula, a friend suggested something she had never heard of before. Her friend couldn't stop talking about the relief she’d found with Moogco Silver Nursing Cups. Jessica was skeptical, but at that point, she was desperate enough to try anything.
Immediate Relief, Finally
The moment Jessica slipped the silver nursing cups on, she felt it—instant relief. The cool, smooth metal acted as a protective barrier against the constant, painful friction from her nursing bra.
What a difference it made! Unlike creams that you have to constantly wipe off before a feed, the cups were effortless. She just popped them on between nursing sessions, and that was it. This simple act gave her raw, damaged skin a real chance to rest and heal without being rubbed and irritated all day.
"I was right on the edge of quitting," Jessica said. "The pain was just too much. These silver cups were my last hope, and they honestly saved my breastfeeding journey. The constant rubbing was gone, and for the first time in weeks, I felt like I could actually heal."
This simple, elegant design gave her back a sense of comfort she thought was gone forever. That little physical shield was the first step in turning a painful ordeal back into a positive experience.
The Healing Power of Natural Silver
What really blew Jessica away was how quickly she started to heal. Pure silver has natural properties that are known to soothe irritated skin. By wearing the Moogco Silver Nursing Cups, she was essentially creating the perfect healing environment for her skin between every single feeding.
The cups work with your body's own healing process. She wasn't just masking the pain with a balm; she was using a tool that helped her body truly recover.
Her entire breastfeeding experience changed. The pain vanished, the cracks healed, and nursing finally became the beautiful, bonding time she had always dreamed of. She was no longer bracing for pain at every latch but was instead cherishing those quiet moments with her son.
Jessica’s story is a perfect example of how sometimes the simplest solutions work best. For moms out there going through the same thing, learning about the benefits of Moogco Silver Nursing Cups could be a total game-changer. She went on to nurse her son for over a year—a goal she once thought was impossible—all because she found the right kind of help when she needed it most.
Your Diaper Changing Questions Answered
Even after you've changed a dozen diapers, questions always seem to pop up—usually at 3 a.m. when you're half-asleep. Here are some quick, straightforward answers to the things new parents wonder about most.
How Often Should I Change a Newborn’s Diaper?
With newborns, think "often." You'll want to change them roughly every two to three hours, or as soon as you know they're wet or soiled. It sounds like a lot, but newborns can pee up to 20 times a day, so staying on top of it is your best defense against diaper rash.
This keeps their super-sensitive skin from sitting in moisture, which is what usually causes that angry red irritation. That said, don't feel like you have to wake a sleeping baby for a routine change unless the diaper is heavily soiled or they're especially prone to rashes. A little extra sleep is gold for both of you.
When Is It Time to Move Up a Diaper Size?
Knowing when to size up is the secret to avoiding leaks and the dreaded "blowout." The weight range on the box is a good starting point, but every baby is shaped differently.
Keep an eye out for these classic signs:
- Red Marks: If the diaper is leaving angry red marks on your baby’s tummy or thighs, it’s probably digging in and too snug.
- Constant Leaks: Are you suddenly dealing with leaks all the time, especially overnight? That’s a good sign the diaper just can’t absorb enough for your growing baby.
- A Struggle to Fasten: When the tabs barely reach the waistband, it's definitely time to go up a size.
A well-fitting diaper should feel snug, but you should still be able to easily slide two fingers under the waistband. This keeps everything contained without being uncomfortably tight.
Cloth Versus Disposable Diapers
The great diaper debate! Honestly, the choice between cloth and disposable diapers comes down to what works for your family. There’s no right or wrong answer.
Disposables are all about convenience and high absorbency, which is why they're a go-to for many busy parents, especially when you're out and about.
Cloth diapers, on the other hand, have a bigger upfront cost but can save you a lot of money over time. They're also a great eco-friendly choice, and many parents love that they’re made from natural fibers. Today’s cloth diapers aren't like your grandmother's—they're surprisingly user-friendly with adjustable snaps and built-in waterproof covers.
How Do I Handle Dirty Diaper Disposal?
Keeping your home from smelling like, well, a diaper pail is all about a good disposal strategy. For poopy diapers, dump as much of the solid waste as you can into the toilet. Then, roll the diaper up into a tight little ball and use the sticky tabs to secure it shut.
A dedicated diaper pail is a game-changer for controlling odors. Look for one with a tight-fitting lid and a spot for a carbon filter. And of course, good hygiene is key. For more on keeping germs at bay, you can find helpful information on topics like the effectiveness of hand sanitizers against viruses and why good old-fashioned handwashing is still king.
At Moogco Baby, we know that parenting is full of questions. We’re here to support you on your journey, from diaper duty to late-night feedings and all the amazing moments in between. Check out our thoughtfully curated collection of baby essentials at https://www.moogcobaby.com.
Related Guides You Might Love
- How to Change Diaper: how to change diaper in 5 Easy Steps for New Parents
- How to Change Diaper: how to change diaper in 5 Easy Steps for New Parents
- How to Wean Baby From Breastfeeding: A Gentle Practical Guide
- How to Wean Baby From Breastfeeding: A Gentle Practical Guide
- Diaper Dust Review: Does This Odor Eliminator Work?
- Diaper Dust Review: Does This Odor Eliminator Work?
- Mastering how to change a diaper: A Quick Guide for New Parents
- Mastering how to change a diaper: A Quick Guide for New Parents
- Your Guide to Soothing Relief with Moogco Silver Nursing Cups
- Your Guide to Soothing Relief with Moogco Silver Nursing Cups
Bring this guide home with 20% off.
Use code BABY20 for 20% off →
Frequently Asked Questions
What should I do if my baby keeps rolling over during diaper changes?
Rolling is a normal developmental milestone that can make diaper changes tricky! Try keeping a special toy that only comes out during changes to hold their attention. You can also try standing changes once your baby is mobile, using pull-on style diapers. Some parents find that singing a familiar song creates just enough distraction to finish the job safely.
Is it normal for my baby's diaper area to look red after every change?
Mild pinkness that goes away quickly is usually normal, especially if you're using wipes. However, persistent redness, bumps, or raw-looking skin could signal the start of diaper rash. Make sure you're patting the area completely dry before diapering, and consider a barrier cream at every change. If redness worsens or doesn't improve in a day or two, check with your pediatrician.
Can I use cloth wipes instead of disposable ones?
Absolutely! Cloth wipes are a wonderful, eco-friendly option that many parents love. You can use soft cotton or bamboo washcloths dampened with plain warm water, which is especially gentle on newborn skin. Keep a stack near your changing station and toss used ones in a separate bin to wash with your regular laundry. Many parents find cloth wipes are softer and more effective than disposables.
How do I change a diaper in public without a changing table?
A portable changing pad is your best friend for on-the-go changes. You can use the back seat of your car, a clean bench, or even lay a blanket on the floor in a family restroom. Always keep one hand on your baby and bring a small wet bag for dirty diapers. Having a compact diaper clutch stocked with essentials means you're prepared anywhere.
What's the best way to clean baby boy versus baby girl during changes?
For girls, always wipe from front to back to prevent bacteria from reaching the urethra and causing infections. Clean gently between all the folds but don't scrub inside the labia. For boys, wipe around the diaper area thoroughly and gently clean the penis and scrotum, but there's no need to pull back the foreskin if uncircumcised. Both need all those thigh creases checked carefully.
Should I wake my sleeping baby to change a wet diaper?
Generally, you don't need to wake a sleeping baby just for a wet diaper, especially overnight. Modern diapers are very absorbent and designed to keep moisture away from skin. However, if your baby has pooped or has a soaked-through diaper, it's worth a gentle change to prevent rash and keep them comfortable. Use dim lighting and minimal talking to help them drift back to sleep.
How can I keep my baby warm during winter diaper changes?
Cold air on bare skin can make diaper changes uncomfortable in winter. Try using a space heater to warm the changing area before you start, or place a heating pad under the changing pad cover (remove it before laying baby down). A wipe warmer prevents the shock of cold wipes, and keeping a lightweight blanket over their top half during the change helps too. Work quickly but thoroughly to minimize exposure.
What should I do if my baby pees mid-change?
This happens to every parent, especially with baby boys! Keep a clean cloth diaper or small towel handy to quickly cover the area if it happens. For boys, you can drape a wipe or cloth over the penis right when you open the diaper, as the exposure to air often triggers urination. Just pause, clean up the extra mess, let the area dry, and continue with a fresh diaper. It's totally normal and gets less frequent as they grow.
From Moogco Studio
Printable and personalized nursery essentials. Designed by moms for moms.


About the Editor
Eda Ulger is the editor at Moogco Baby and a mom of two. She curates and edits our guides so every piece is honest, practical, and genuinely helpful for the early days of motherhood.