

Changing a diaper, especially in the middle of the night, can feel like you're trying to disarm a tiny, wiggling bomb. The secret to making it less of a frantic scramble? A well-organized changing station. Having everything you need within arm's reach isn't just a convenience—it's a safety essential that keeps one hand on your baby at all times.
Setting Up Your Diaper Changing Command Center
Think of this space as your mission control. A clean, organized layout means no more fumbling for wipes while holding onto a wiggly baby. Your main goal is to create a safe and efficient spot on a sturdy, waist-high surface.

Here’s what I’ve found makes a world of difference:
Rash-fighting picks moms reorder
Everything for diaper duty
Take $15 off at checkout, applied automatically when you shop through this link.
Shop with MAMA15 →Free US shipping over $100. Code applies automatically at checkout.
- A Comfy Changing Pad: Go for something cushioned and waterproof. A wipeable surface is a lifesaver, and you'll want one that keeps your baby comfortable without any awkward plastic-y folds.
- Smart Storage: Bins, drawers, or a rolling cart are perfect. The key is to have diapers, wipes, and creams right there, ready to grab. No-fuss access is the name of the game.
- Soothing Light: For those 3 a.m. changes, a soft nightlight is a must. It provides just enough light to see what you're doing without fully waking (and startling) your little one.
- A Secure Surface: Safety first, always. Make sure your changing pad has a safety strap, or that the table itself has raised sides to prevent any chance of rolling.
Did you know that the average baby goes through 2,500 to 3,000 diapers before they’re potty trained? That’s a lot of changes. It’s no surprise the global diaper market was valued at USD 72.37 billion in 2023 and is expected to climb to USD 112.51 billion by 2034. You’re part of a massive club of parents just trying to keep their babies clean and dry!
If you’re still trying to figure out the best setup, we have a whole guide dedicated to it. Check out our thoughts on how to choose the right one for your nursery.
The Ultimate Diaper Station Checklist
To make setup a breeze, here’s a handy checklist of everything you’ll want to have stocked and ready to go. Think of it as your recipe for a stress-free diaper change.
| Item Category | Essential Items | Pro-Tip from Moogco |
|---|---|---|
| Changing Essentials | Waterproof changing pad, extra pad covers/liners | Disposable liners are a game-changer for catching big messes. Just toss and go! |
| Cleaning Supplies | Unscented baby wipes, a gentle bottom wash or spray | Store your wipe packs upside down. Gravity helps the next wipe pop up easily. |
| Diapers | A good stock of your baby’s current size | Always keep a few from the next size up on hand. Growth spurts happen overnight! |
| Creams & Lotions | Diaper rash cream, baby lotion or oil | Keep the diaper cream tube open (but capped) so you can apply it with one hand. |
| Organization | Baskets, bins, or drawer dividers | Label your bins (Diapers, Wipes, Creams). It makes it easy for you or a partner to restock. |
| Disposal | Diaper pail or a lidded trash can, pail liners | A sprinkle of baking soda at the bottom of the pail helps keep odors in check. |
| Extras | Pacifiers, a small toy, burp cloths, hand sanitizer | A special "changing table only" toy can be a fantastic distraction for a fussy baby. |
Having a system really helps you stay on top of things. Once you get into the habit of restocking your station after a few changes, it becomes second nature. A quick wipe-down of the pad and surrounding area also keeps germs at bay and the space feeling fresh.
And don't forget about when you're on the move! Knowing what to pack in a nappy bag ensures you’re just as prepared out in the world as you are at home.
Mastering the Diaper Change From Start to Finish
Alright, your changing station is set up and looking official. Now for the main event. Let's be real—knowing how to change a diaper is less about following a manual and more about finding a rhythm that works for you and your little one. It’s about learning to handle the wiggles and the messes with confidence. Forget the sterile instructions; this is how it really goes down.
This simple flow shows you the big picture: get your station ready, have your supplies in reach, and then bring in the baby.
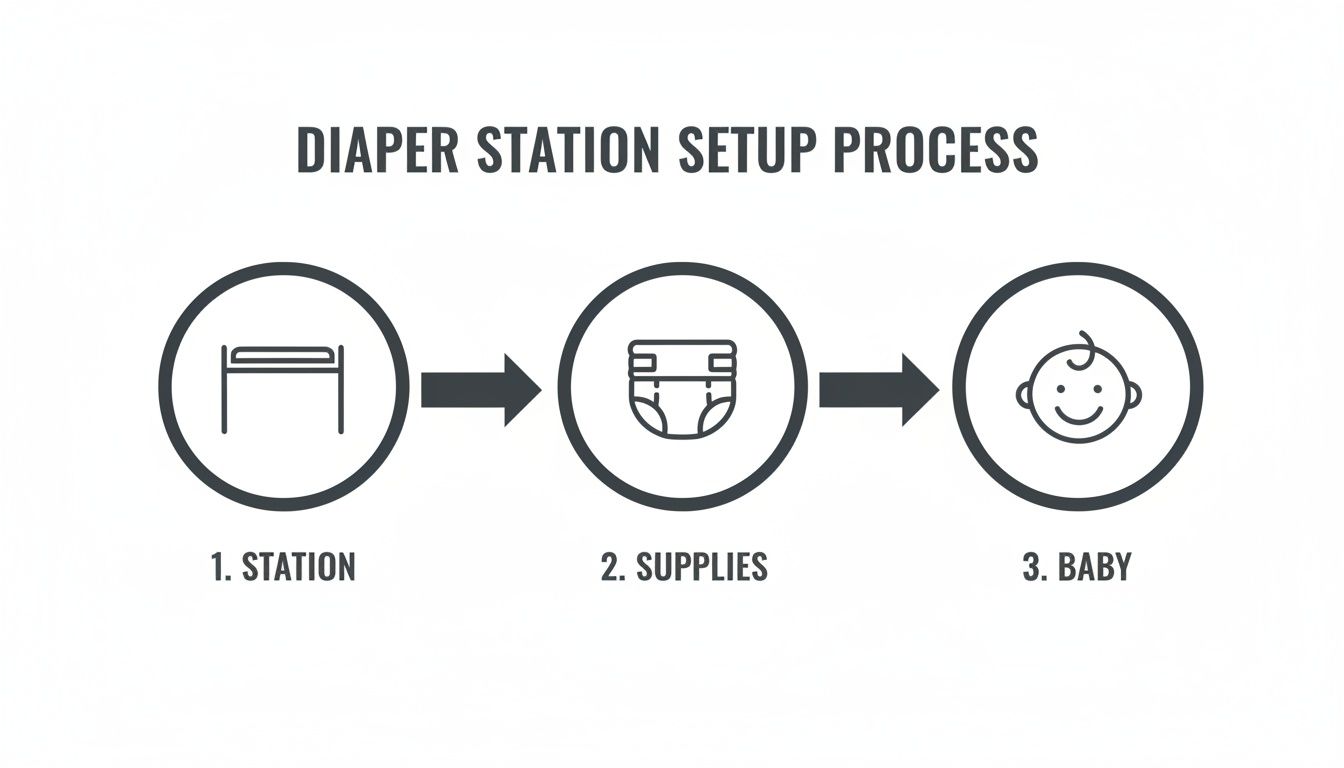
See? A great diaper change starts before your baby even hits the mat. Preparation is everything.
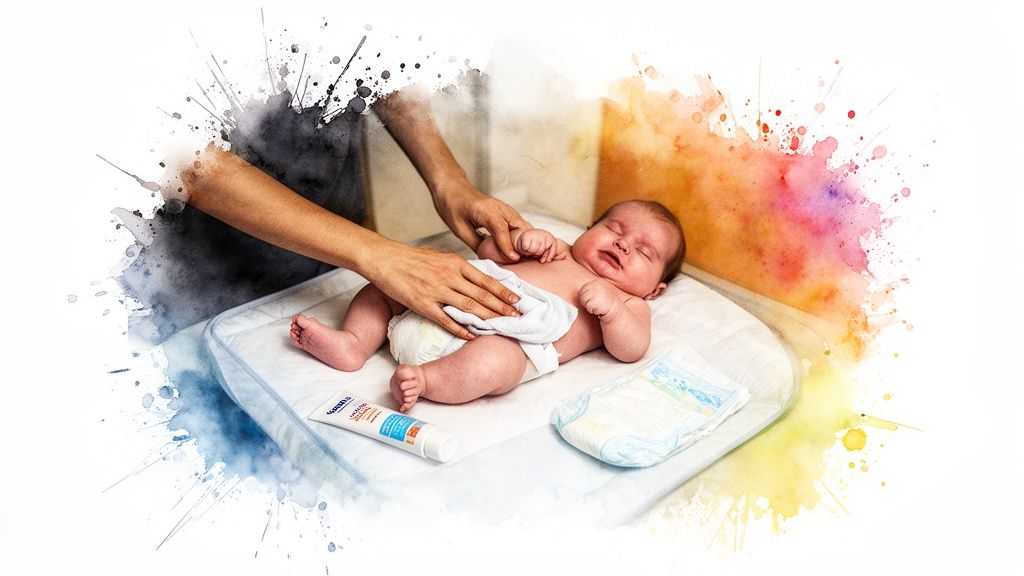
The Gentle Lay-Down and Unfastening
First things first, gently place your baby on the changing pad. From this moment on, a cardinal rule of diaper changing is to always keep one hand on your baby. Safety first, always.
Now, unfasten the tabs on the dirty diaper, but hold off on yanking it out. Just fold the front section down over itself. This little move creates a temporary barrier that can save you from a stray hand or foot smearing the mess everywhere. It's a game-changer.
Next, gently hold your baby’s ankles and lift their bottom just enough to slide the clean diaper underneath them. You’ll want the top of the back half to line up with their waist. Now you've got a clean landing pad ready for when the dirty work is done.
The Cleanup Crew Techniques
This is where the real art comes in. Grab your wipes or a damp cloth and get ready to clean thoroughly.
- For Baby Girls: The golden rule is to wipe from front to back. This isn't just a suggestion; it's crucial for preventing bacteria from causing a urinary tract infection.
- For Baby Boys: Brace yourself for potential surprise fountains! A handy trick is to drape a clean wipe or even the front of the old diaper over him while you clean. Don't forget to get into all the little creases.
Once they're sparkling clean, carefully pull the soiled diaper out. Fold it in on itself, use the sticky tabs to wrap it into a tight little bundle, and toss it well out of your baby's reach.
A Mom's Story of Resilience
"In those first few weeks, I was overwhelmed. Between mastering diaper changes and learning to breastfeed, my body felt exhausted. My nipples were so sore and cracked that I was close to giving up on nursing altogether. A friend recommended Moogco Silver Nursing Cups, and they were a game-changer. The natural healing properties of the silver nursing cups soothed the pain almost instantly, allowing me to heal without messy creams. They saved my breastfeeding journey, proving that finding the right support for yourself is just as important as caring for your baby."
Securing the Perfect Fit
Before you tape up that fresh diaper, give your baby’s skin a moment to air dry. This is one of the single best things you can do to prevent diaper rash. If you're using a barrier cream, this is the perfect time to apply a thin, even layer.
Bring the front of the clean diaper up between their legs and lay it flat against their tummy. Fasten the tabs so they're snug, but not strangling them. The classic test is to make sure you can easily slide two fingers between the waistband and their belly.
One last, crucial step: run your finger along the leg cuffs to make sure they're fanned out, not tucked in. This little detail is your best defense against leaks and blowouts! For more foundational tips, our complete guide on diapering 101 for new parents offers extra insights.
Handling Common Diapering Challenges with Confidence
So, you've got your changing station all set up, but let's be real—diapering is full of surprises. The dreaded up-the-back blowout, an angry red rash, or a baby who suddenly treats diaper time like an Olympic wrestling match... we've all been there. It’s all a normal part of the parenting journey.
The trick isn’t avoiding these moments, but knowing how to handle them with a calm, confident game plan.
And you'll get plenty of practice. Newborns can easily go through 8-12 diapers a day. It’s no wonder the global baby diaper market is projected to be worth a staggering USD 63 billion in 2025 and is on track to hit USD 115 billion by 2035. Having a few pro tips in your back pocket makes all the difference.
Conquering Diaper Rash
Diaper rash is often the first big hurdle for new parents. It's incredibly common—at least half of all babies will get it at some point. The usual suspects? Prolonged wetness and friction. When moisture is trapped against that delicate skin, it can quickly lead to irritation, redness, and a very unhappy baby.
Here's how to tackle it head-on:
- Prioritize Air Time: This is your best friend. Let your baby go diaper-free for short stretches on a waterproof pad. Fresh air is one of the fastest and most effective ways to help their skin heal.
- Create a Barrier: A thick, zinc oxide-based cream is your go-to. Don't be shy with it! The goal is to create a solid protective layer between their skin and any moisture. Think of it like icing a cake.
- Be Gentle: When a rash is present, the last thing you want to do is scrub. Pat the area gently with a soft, damp cloth or switch to fragrance-free wipes to avoid further irritation.
For a more in-depth look, our guide on how to prevent and manage diaper rash is packed with gentle, effective solutions.
Managing Blowouts and Squirmy Babies
Ah, the infamous diaper blowout. When it happens, take a deep breath and work methodically. Always clean from top to bottom, using the front of the soiled diaper to handle the initial mess. Pro tip: always keep a spare set of clothes nearby—for both of you!
And what about when your sweet, cooperative baby suddenly decides they're an alligator doing a death roll on the changing pad?
Try these tricks:
- Keep a special toy that only comes out during diaper changes.
- Sing a silly song or make funny faces to create a positive distraction.
- Talk them through what you're doing in a calm, soothing voice.
By turning a routine task into a moment of connection, you can transform a stressful chore into a positive interaction that actually strengthens your bond.
How Silver Nursing Cups Saved One Mom's Breastfeeding Journey
Learning to change a diaper is just one of a thousand new skills you master as a new parent. While you're figuring out the perfect swaddle and trying to decode your baby's cries, you're also dealing with your own physical recovery. For so many moms, that recovery includes the intense—and often painful—challenge of breastfeeding.
This was exactly the reality for Sarah, a new mom who felt like she was failing. She was getting the hang of diaper duty, but breastfeeding was a completely different story, filled with pain and anxiety.
Her nipples were cracked and unbelievably sore, turning every single feeding into a tearful, dreaded event. She’d tried all the creams and balms the internet recommended, but nothing gave her more than a few minutes of relief. The emotional weight was crushing, and she was heartbreakingly close to giving up on the nursing bond she wanted so badly.
The Turning Point
Feeling completely defeated, Sarah opened up to a friend who’d been through the same thing. Her friend’s secret weapon wasn’t another messy cream, but something elegant and simple: Moogco Silver Nursing Cups. Sarah was skeptical, but at that point, she was desperate enough to try anything.
The difference was immediate and shocking. Unlike the creams that had to be wiped off before every feed, these small, comfortable cups were just worn between nursing sessions. They created a protective shield, stopping the constant, painful friction from her bra.
The relief was almost instant. The silver nursing cups had a soothing, cooling effect that eased the constant discomfort. Even better, they allowed a tiny bit of her own milk to create a moist, healing environment right where she needed it most. And because silver is naturally antimicrobial, she felt safe knowing she was healing without any chemicals or ointments that her baby might ingest.
"I couldn't believe it. Within a couple of days, the worst of the pain was gone, and my skin was actually healing. It felt like I got a piece of myself back. I could finally enjoy feeding my baby without bracing for pain."
Reclaiming Confidence and Connection
This one simple change was so much more than just physical relief—it was a lifeline. By finally finding a way to take care of her own needs, Sarah was in a much better place to care for her baby.
The Moogco Silver Nursing Cups didn't just save her breastfeeding journey; they gave her back her confidence as a mother. Her experience was a powerful lesson: finding the right tools to support yourself is just as important as learning how to change a diaper. Her story is a perfect reminder that self-care isn't selfish; it's a non-negotiable part of being a great parent.
If you're struggling with similar hurdles, you can learn more about how silver nursing cups support breastfeeding moms. Finding the one thing that works for you can truly change everything.
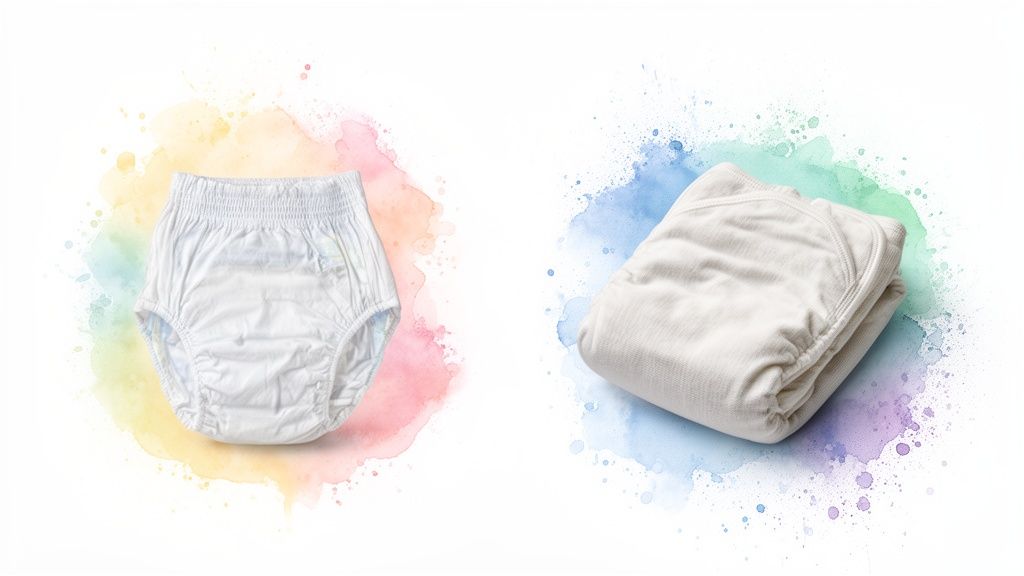
Choosing Between Disposable and Cloth Diapers
Ah, the great diaper debate. It’s one of the first big decisions you’ll make as a new parent, and it can feel surprisingly loaded. But let's be real: choosing between cloth and disposables isn't a test of your parenting philosophy. It's about figuring out what truly works for your family, your budget, and your day-to-day reality.
There's no single right answer here, just the one that makes your life a little easier.
What's Changed the Diaper Game?
For most families, convenience is king. When Pampers hit the market back in 1961, they completely transformed a messy, time-consuming chore. Fast forward to 1980, and disposables had already captured 80% of the U.S. market.
Considering modern parents will tackle anywhere from 6,000 to 10,000 diaper changes in the first couple of years, it's no wonder the grab-and-go ease of disposables often wins. They're simple, reliable, and boast impressive 99% leak protection rates. It's a game-changer for busy parents. For a deeper look at how the market has evolved, you can explore more about the growth of the diaper industry.
Cloth vs. Disposable Diapers at a Glance
So, how do you decide? Let’s break down the major differences to see what might fit your routine best. This little cheat sheet can help you weigh the pros and cons side-by-side.
| Feature | Disposable Diapers | Cloth Diapers |
|---|---|---|
| Upfront Cost | Low initial cost. You just buy packs as you go, but it adds up. | High initial investment to build a stash, but cheaper long-term. |
| Convenience | Peak convenience. Easy to use, travel with, and just toss away. | Lower. Requires a washing routine and more planning for outings. |
| Skin Sensitivity | Can contain fragrances or chemicals that might irritate some babies. | Often made from natural fibers like cotton, which can be gentler. |
| Environmental Impact | A major contributor to landfill waste. | Requires a lot of water and energy for washing and drying. |
Ultimately, both have their own environmental considerations, and both can work great for your baby. It really comes down to which set of trade-offs you're more comfortable with.
Let's Talk About Laundry
For many parents considering cloth, the laundry is the biggest hurdle. And it’s true—it's more involved than your regular load of towels. You’ll need a dedicated system for storing dirty diapers (like a special pail or wet bag), a specific washing routine with baby-safe detergents, and the time to run a load every 1-3 days.
While modern cloth diapers have come a long way with snaps and waterproof covers, it's still a significant time commitment you need to be prepared for.
Parenting Real Talk
The "best" choice is the one that reduces your stress, not adds to it. If the thought of one more pile of laundry makes you want to cry, disposables are a perfectly valid and practical choice. If you're passionate about sustainability and find a good rhythm, cloth can be incredibly rewarding.
Making the Final Call
At the end of the day, this decision is all about balancing cost, convenience, and your personal values. You don't have to be all-or-nothing, either! Many families land on a hybrid approach, using disposables for travel and overnights while sticking with cloth at home. It’s the best of both worlds.
If you are leaning toward reusable options and want to dig deeper, our guide on whether reusable diapers are best for the environment offers some fantastic insights. Whichever path you choose, trust that you’re making a great decision for your family.
Got Questions? Let's Talk Diaper Changes
Even with a step-by-step guide, you're bound to run into a few head-scratchers, especially during those bleary-eyed 3 a.m. changes. Don't worry, it happens to all of us!
Think of this as your personal troubleshooting corner for the most common questions we hear from parents. We've compiled some quick, practical answers to help you feel more confident and handle whatever comes your way.
How Often Should I Really Change My Newborn's Diaper?
With newborns, it feels like you're changing them constantly, and that's exactly right. The golden rule is to change their diaper every 2-3 hours, or as soon as you know it's soiled.
Their skin is incredibly delicate, and frequent changes are your number one defense against diaper rash. A great habit is to change them right after each feeding and whenever they wake up. Many newborn diapers have a wetness indicator line, which is a lifesaver for taking the guesswork out of it.
What’s the Best Way to Prevent Diaper Rash?
Keeping diaper rash at bay really comes down to one simple mantra: keep your baby's bottom clean and dry. This means being on top of those diaper changes and cleaning the area gently but thoroughly every single time.
Here's a pro-tip that makes a huge difference: after wiping, let their skin air dry for a minute before putting on the fresh diaper. That little bit of air time is magic. Using a good barrier cream with zinc oxide also creates a protective layer against moisture.
My Baby Screams During Every Diaper Change. What Can I Do?
First off, know that you are not alone—this is incredibly common. Babies often cry during changes because they suddenly feel cold and exposed. The trick is to make the whole experience feel as warm, quick, and comforting as possible.
Try warming the room up a bit, singing or talking to them in a calm, soothing voice, and maybe even having a special "diaper time only" toy to distract them. Your relaxed energy and gentle touch can really help turn a stressful moment into a sweet bonding opportunity.
How Do I Know the Diaper Fits Right to Avoid Leaks?
Getting the fit right is the secret to preventing leaks and the dreaded blowout. The diaper should feel snug around their waist, but not tight. You should be able to easily slide two fingers between the diaper and your baby's tummy.
The most critical step? Always run your finger along the leg cuffs—those little ruffles around their thighs—and make sure they are pulled out, not tucked in. Those cuffs are your main defense against side leaks! The waistband should sit just below their belly button, with the tabs fastened symmetrically.
At Moogco Baby, we're here to support you through every part of your parenting journey, from diapering must-haves to tools that help you heal and thrive.
Explore our thoughtful collection of essentials designed for you and your little one at https://www.moogcobaby.com.
Bring this guide home with $15 off.
Use code MAMA15 for $15 off →
Featured pick from Moogco
Bambo Nature Organic Baby Wipes: 99% Water (Pack of 12, 64 ct. Each)
$58.91 $60.91
Shop this pick →
Frequently Asked Questions
Should I wake my sleeping baby to change a wet diaper?
Generally, no. If your baby is sleeping soundly and the diaper is only wet (not soiled), it's usually fine to let them sleep. Modern diapers are highly absorbent and designed to wick moisture away from the skin. However, if your baby has a diaper rash or very sensitive skin, you might want to do a quick, gentle change to keep them dry and comfortable.
Is it okay to use baby powder during diaper changes?
Most pediatricians advise against using talcum-based baby powder because it can be a respiratory hazard if inhaled. If you want to use powder, choose a cornstarch-based option and apply it to your hands first, then pat it on your baby's skin away from their face. That said, keeping the area clean and dry with good airflow is usually enough without any powder at all.
How do I handle a diaper change when my baby rolls over constantly?
Welcome to the mobile baby club! Try giving them a special toy that only comes out during diaper time to keep their hands busy. You can also try standing changes once they're steady on their feet, using pull-up style diapers. Another trick is to narrate what you're doing or sing a silly song to keep them engaged and cooperative for just long enough to get the job done.
What should I do if my baby has a diaper blowout in public?
First, take a deep breath because it happens to everyone. Find a changing area or your car, and lay down a changing pad or towel. Remove as much of the mess as you can with wipes, then consider giving baby a quick rinse if a sink is available. Always pack extra outfits, wipes, and plastic bags in your diaper bag. A change of clothes for yourself is also a smart idea for these exact moments.
Can I reuse a diaper if it was only on for a few minutes?
If the diaper is completely clean and dry and was only on briefly (like you put it on, realized it was the wrong size, and took it right off), then yes, you can reuse it. But if there's any wetness, even a tiny bit, it's best to toss it. Used diapers lose their absorbency and shape, and reusing a wet one can lead to leaks and rashes.
Do I need to use diaper cream at every single change?
Not necessarily. If your baby's skin looks healthy and isn't showing signs of irritation, you don't need to apply cream every time. Diaper cream is a preventive barrier and a treatment, so it's most useful when you notice redness or during times when diaper rash is more likely, like teething or after antibiotics. A little goes a long way, and sometimes less is more.
How can I tell if my baby is ready to move up a diaper size?
The biggest clues are frequent leaks, red marks around the thighs or waist, or if the diaper doesn't cover their bottom fully anymore. If you're struggling to fasten the tabs comfortably or the diaper looks stretched and tight, it's time to size up. Babies grow fast, and going up a size can make a huge difference in comfort and leak prevention overnight.
Is it normal for my baby to pee or poop the second I take the diaper off?
Absolutely, and it's one of the universal truths of parenting! The rush of cool air on their skin can trigger the reflex to go. For boys, keep a wipe or cloth handy to cover them as soon as you open the diaper. For all babies, just expect it and have your cleanup supplies ready. With time, you'll get faster and develop a sixth sense for when it's coming.
From Moogco Studio
Printable and personalized nursery essentials. Designed by moms for moms.


About the Editor
Eda Ulger is the editor at Moogco Baby and a mom of two. She curates and edits our guides so every piece is honest, practical, and genuinely helpful for the early days of motherhood.