

Learning how to store breast milk properly is one of those skills that feels like a total game-changer. It gives you freedom, flexibility, and the peace of mind that your baby is getting all that liquid gold, even when you’re not there.
The good news? It's pretty simple once you know the rules. A great little shortcut to remember is the rule of 4s: freshly pumped milk is good for up to 4 hours at room temperature and up to 4 days in the fridge.
The "Why" Behind Safe Storage
So, why are these timelines so important? It all comes down to keeping that milk safe and preserving its incredible benefits. Your breast milk is a living substance, packed with antibodies, healthy fats, and nutrients perfectly tailored for your baby. Following storage guidelines minimizes bacterial growth and protects all that goodness you worked so hard to produce.
Mastering the pump-to-storage-to-bottle routine really builds your confidence, especially if you're planning to return to work or just want a little backup supply.
Your Go-To Timelines for Storing Milk
Let's break down exactly how long your milk will last in different spots. Committing these to memory will make your life so much easier.
- On the Counter: Freshly expressed milk is safe at room temperature (up to 77°F or 25°C) for up to 4 hours. If your room is particularly warm, it's best to get it in the fridge sooner.
- In the Fridge: You can store fresh milk in the back of the refrigerator (at or below 40°F or 4°C) for up to 4 days. Storing it in the back, away from the door, helps keep the temperature consistent.
- In the Freezer: For the long haul, a standard freezer is your best bet. Milk can be stored for up to 6 months for best quality, though it’s safe for up to 12 months.
This little visual is perfect for saving to your phone or printing out for the fridge!
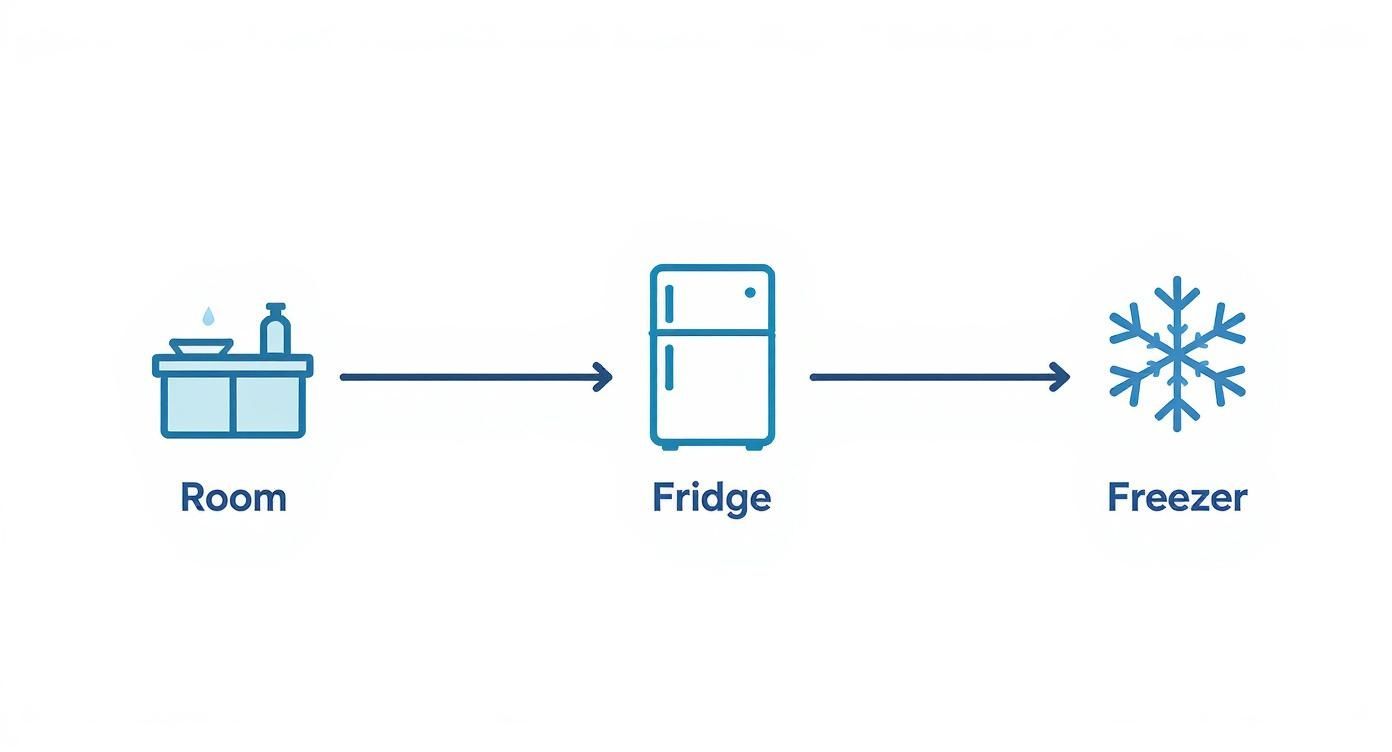
As you can see, the colder the storage, the longer your milk keeps. Pretty straightforward!
Breast Milk Storage Timelines at a Glance
For those times when you just need a quick answer, this chart is a lifesaver. It pulls together the latest CDC guidelines into one easy-to-read spot.
| Location | Temperature | Maximum Storage Time | Best Practice Tip |
|---|---|---|---|
| Countertop | Up to 77°F (25°C) | 4 hours | Transfer to the fridge as soon as possible, especially in a warm room. |
| Refrigerator | 40°F (4°C) or colder | 4 days | Store in the back of the fridge, not the door, for consistent cooling. |
| Standard Freezer | 0°F (-18°C) or colder | 6 months (best), 12 months (acceptable) | Freeze in small portions (2-4 oz) to minimize waste. |
| Deep Freezer | -4°F (-20°C) or colder | 12 months | Ideal for building a long-term stash. |
Remember, these guidelines are for healthy, full-term babies. If your baby is a preemie or has health concerns, it’s always a good idea to chat with your pediatrician about storage times.
Protecting Every Last Drop
Sticking to these guidelines isn't just about preventing spoilage—it’s about protecting the powerful, living components in your milk. It’s what makes it nature’s perfect food, after all. Improper handling can degrade those amazing antibodies and vital nutrients. You can learn more about what's inside breast milk and why it's so incredible right here: https://moogcobaby.com/blogs/news/what-s-inside-breast-milk-the-wonders-of-nature-s-perfect-food
Sticking to established storage timelines isn't just about safety—it's about preserving the nutritional and immunological power that makes every ounce of your milk so incredibly valuable for your baby's development.
Understanding how breast milk fits into your family’s plan is key. It’s helpful to explore broader feeding choices, including breastfeeding, formula, and combo feeding to find what works best for you and your little one.
Choosing the Best Breast Milk Storage Containers
So, you’ve gotten the hang of your pump and now you’re staring at a bottle of freshly expressed milk. The next big question is: where do you put all of this liquid gold? The containers you choose are just as important as how long you store the milk, playing a huge role in its safety, your convenience, and preserving those precious nutrients. You can’t just grab any old container from the kitchen; it needs to be food-grade, sanitary, and up for the job.
Storage bags, bottles, sterilizers
Store every drop, safely
Take 25% off at checkout, applied automatically when you shop through this link.
Shop with READER25 →Free US shipping over $100. Code applies automatically at checkout.
It’s no surprise that the market for these products is massive. The global breast milk storage industry was valued at over USD 509 billion and is expected to more than double by 2033. That number shows just how many parents are looking for reliable, convenient ways to store milk.
Comparing Your Main Container Options
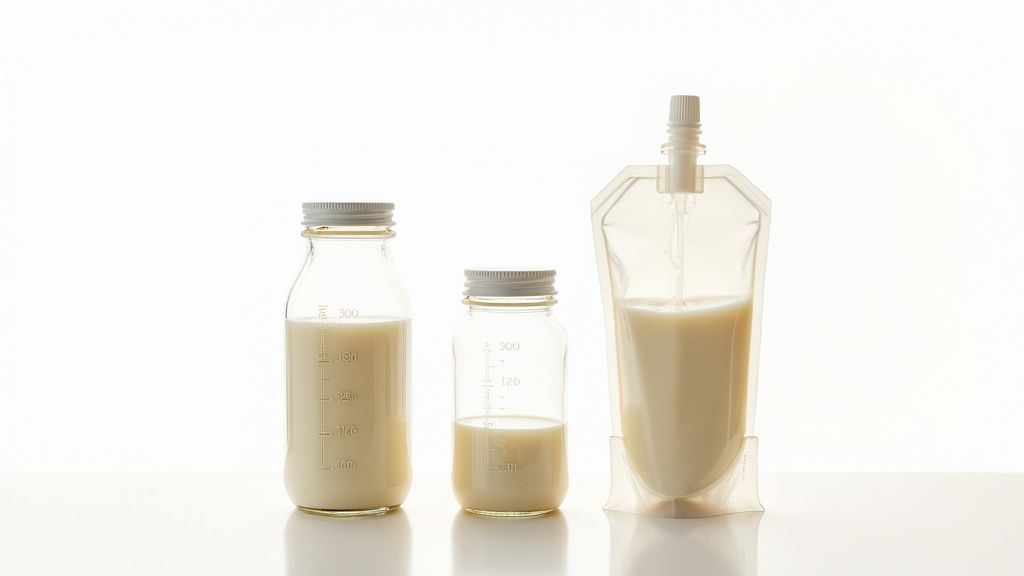
When you start shopping around, you’ll quickly notice three main players in the breast milk storage game: plastic bottles, glass containers, and disposable storage bags. Each one has its perks and pitfalls, and honestly, most parents I know end up using a mix of all three for different situations.
-
BPA-Free Plastic Bottles: These are a workhorse. If you plan to pump directly into the bottle you’ll feed from later, they’re a fantastic reusable option. They’re tough, lightweight, and you don’t have to worry about them shattering like glass. The most important thing is to make sure they are made from food-grade plastic and are clearly labeled BPA-free so no unwanted chemicals can leach into the milk.
-
Glass Containers: Glass is another great reusable choice. It’s completely non-reactive, so there’s zero chance of chemicals getting into your milk. Plus, glass is a breeze to clean and sanitize. The trade-offs? It's heavier, usually more expensive, and, of course, there's always the risk of it breaking if you drop it.
-
Disposable Milk Storage Bags: These are the undisputed champions of freezer space. They’re designed to be frozen flat, which lets you stack them like little bricks and maximize every inch of your freezer. They also come pre-sterilized and usually have a double-zipper seal to keep leaks at bay. On the downside, they can be a bit fragile and prone to tearing, and I’ve found the volume markings can sometimes be a little... optimistic.
Pro Tip: When you’re filling a storage bag, gently squeeze all the air out before sealing it up. Also, be sure to leave about an inch of space at the top. Breast milk expands when it freezes, and this simple trick will stop the bag from bursting.
Features That Truly Matter
It’s easy to get lost in all the product options out there. Before you can store milk, you obviously need a reliable way to collect it. You might want to explore some automatic breast milk pumps and feeding bottles to find a system that works for you. Once you’re ready to store, here are the non-negotiables to look for in a container:
- A Secure, Leak-Proof Seal: This is everything. Whether it’s a tight screw-top lid or a sturdy double-zipper lock, you need to trust that it won’t spill in your fridge or freezer.
- Accurate Measurement Markings: Clear, easy-to-read volume lines are a lifesaver for portioning out milk and keeping track of how much your baby is eating.
- Food-Grade and BPA-Free Materials: Always double-check that any plastic container or bag is made from materials certified as safe for food and is free from chemicals like BPA and BPS.
Sanitation Is Absolutely Essential
No matter what kind of container you settle on, keeping it clean is critical for your baby’s safety. Bacteria loves to grow in leftover milk residue, so every reusable piece has to be sanitized properly.
For reusable bottles and containers, start by washing them in hot, soapy water with a brush that’s only used for baby items. After that, you need to sanitize. Popping them in the dishwasher (top rack only!) is a super convenient option. You can also boil the parts in water for five minutes.
We have a whole guide on this, so for a deeper dive, check out these easy methods for sterilizing baby bottles and pacifiers to make sure everything is perfectly clean and safe.
Labeling and Organizing Your Milk Stash Like a Pro
 Once you start pumping regularly, your fridge and freezer can go from organized to a chaotic sea of milk bags in the blink of an eye. Creating a simple, consistent system for labeling and organizing your milk isn't just about being tidy—it's the key to preventing waste and making sure every precious drop gets used.
A good system means no more frantic searching for the oldest bag or trying to decipher a smudged date at 3 a.m. Think of it as inventory management for your baby's most important food. This becomes especially crucial if you have an oversupply; you can find more tips for managing high milk production in our dedicated guide.
The Anatomy of a Perfect Label
What you write on your milk container is just as important as how you store it. A vague label can lead to confusion and, worst of all, wasted milk. Your goal is to see all the essential info at a glance.
Every single bag or bottle needs these two non-negotiables:
- Date of Expression: This is the most critical detail. Always write the full date (month, day, and year) you pumped the milk.
- Volume: Note how many ounces or milliliters are in there. This helps you grab the right amount for a feed without having to guess.
While those two are the must-haves, you might add other details for certain situations. If you’re sending milk to daycare, for example, you’ll absolutely want to add your child’s full name to every single bag or bottle.
Choosing Your Labeling Tools
Trust me, not all markers are created equal, especially when you're dealing with the cold, damp environment of a freezer. A regular pen will smudge and fade, leaving you with a mystery bag of milk.
Your best bet is a permanent, waterproof marker. Sharpies are a parent-favorite for a reason—they actually stay put on both plastic bags and bottle lids, no matter the condensation.
Mastering the FIFO Method
The golden rule of breast milk organization is “First In, First Out,” or FIFO. It’s a simple concept: always use the oldest milk first. This ensures your baby is getting milk that's well within its safe storage window and keeps your entire stash rotated and fresh.
Implementing FIFO doesn't require a complicated setup. You just need a dedicated container.
A shoebox-sized plastic bin or even a gift bag can work perfectly for this. Just place freshly pumped milk in the back of the container and always pull the oldest milk from the front. This simple physical rotation makes grabbing the right bag almost automatic.
For freezer storage, the "brick" method is a total space-saver. Lay your milk bags flat to freeze. Once they’re solid, you can stack these frozen "bricks" upright in a bin or drawer, organized by date. It's so satisfying to see them all lined up!
High-Tech vs. Low-Tech Tracking
So, how do you keep track of your entire inventory? You can go as simple or as detailed as you like. There's no wrong answer here.
-
Low-Tech Simplicity: A small whiteboard on the freezer door or a dedicated notebook can be surprisingly effective. Just jot down the dates and amounts you add, then cross them off as you use them. It’s a quick, visual count of your supply.
-
App-Based Tracking: For parents who love data, there are tons of apps out there for tracking pumping sessions, milk inventory, and feeding schedules. They can send reminders, calculate your total stash, and help you manage everything right from your phone.
Ultimately, the best method is the one you’ll actually stick with. Whether you prefer a pen-and-paper list or a slick app, consistency is what makes the system work. A well-organized stash brings so much peace of mind and empowers you to totally own this part of your feeding journey.
How to Properly Combine and Freeze Breast Milk

So, you’ve started your pumping journey and now you're looking at a collection of bottles, each with a different amount of milk from various sessions. This is totally normal! Learning how to safely combine and freeze your liquid gold is a skill that will make your life so much easier, helping you maximize every drop and cut down on waste. It’s all about keeping that milk safe and nutritious for your little one.
The Golden Rule of Combining Milk
If you remember only one thing, let it be this: never add warm, freshly pumped milk directly to cold, refrigerated milk. That sudden temperature change can rewarm the older milk, creating an environment where bacteria can thrive.
The right way to do it is simple. After you pump, pop that new bottle of milk into the fridge on its own. Give it about an hour to chill down to the same temperature as the milk you pumped earlier. Once they're both equally cold, you’re good to go—combine them into one container.
Just be sure to label the combined batch with the date of the oldest milk. So, if you're mixing Monday's milk with Tuesday's, the whole container gets Monday's date. This way, you’re always using the oldest milk first.
Smart Portioning for Smarter Feeding
It can be really tempting to fill a storage bag all the way to the top, but trust me, freezing in smaller portions is a total game-changer. I always recommend freezing in 2- to 4-ounce increments. This little trick helps you avoid that heartbreaking moment of pouring leftover, thawed milk down the drain because your baby didn't finish a huge bottle.
By freezing smaller amounts, you can thaw exactly what your baby needs for one feeding. If they're still hungry, it’s easy to grab another small bag. No waste, no stress.
This approach gives you so much flexibility, especially since a baby's appetite can change from one day to the next.
It's no surprise that specialized storage bags and bottles have become a must-have for parents. In fact, the global market for these products hit USD 461.2 million and is expected to keep growing. This really shows how many parents, particularly working moms, depend on good storage systems. You can discover more insights about this growing market on datahorizzonresearch.com.
Pro Tips for Freezing Like a Pro
Freezing breast milk isn't just about tossing a bag in the freezer. A few simple tricks can help you build an organized, space-saving stash that will make feedings a breeze later on.
Leave Room for Expansion Like any liquid, breast milk expands as it freezes. Always leave about an inch of space at the top of your bag or bottle to prevent it from bursting. This gives the milk room to grow without breaking the seal.
Freeze Flat for "Milk Bricks" This is the absolute best space-saving hack for a freezer full of milk!
- Once you’ve sealed your milk storage bag, lay it down flat on a cookie sheet or another level surface in your freezer.
- After it's frozen solid, you'll have a thin, stackable "brick" of milk.
- You can then line these bricks up vertically in a storage bin or shoebox, organizing them by date.
This method not only frees up a ton of freezer space but also helps the milk thaw much more quickly and evenly when you need it. For working parents, an organized system is a lifesaver. You can find more strategies in our complete pumping breast milk guide for working moms. Following these simple techniques ensures every ounce of your hard-earned milk is stored safely and efficiently.
Safely Thawing and Warming Milk for Your Baby
https://www.youtube.com/embed/PeCoFNMZ4po
You’ve done the hard work of pumping and building up a fantastic milk stash—way to go, mama! Now for the final, crucial step: getting that liquid gold ready for a feed.
Thawing and warming breast milk isn't complicated, but knowing how to do it right is key. Your goal is to preserve all those amazing nutrients you worked so hard for while keeping your baby safe. The secret? Be gentle. You want to bring the milk to a comfortable temperature without ever overheating it, which can destroy its beneficial proteins and create dangerous hot spots.
The Best Ways to Thaw Frozen Milk
When it’s time to thaw milk from the freezer, slow and steady wins the race. You’ve got a couple of great, safe options.
-
Overnight in the Fridge: This is by far the easiest method. Just pop a frozen bag or bottle from the freezer into the fridge the night before you need it. It usually takes about 12 hours to thaw completely, so it’ll be ready to go in the morning.
-
A Lukewarm Water Bath: Need it a bit sooner? No problem. Place the sealed bag or bottle in a bowl of warm (not hot!) water. You can also hold it under a lukewarm running tap. As the water cools, just swap it out for fresh warm water to keep the process going.
Once your milk is fully thawed, it’s good for up to 24 hours in the refrigerator. Just remember, that 24-hour clock starts as soon as the very last ice crystal has melted—not from the moment you took it out of the freezer.
What to Avoid at All Costs
When you have a fussy baby on your hands, a few shortcuts might seem tempting, but they can be downright dangerous. Please, never use a microwave.
Microwaves heat liquids unevenly, creating scalding-hot spots that can seriously burn your baby’s mouth. That intense heat also nukes the vital immune-boosting components in your milk.
Along the same lines, steer clear of using boiling water on the stovetop. The high heat can have the same nutrient-damaging effect and could even cause chemicals to leach from plastic storage bags or bottles. Stick to the gentle methods—they protect your baby and your milk.
It’s also critical to remember that once breast milk is thawed, it should never be refrozen. The process of thawing and refreezing can break down nutrients and increase the risk of bacterial growth.
Warming Milk and Handling That Creamy Layer
Whether your milk is freshly thawed or you're grabbing a bottle from the fridge, you can warm it up using that same trusty water bath method. Just place the bottle in a bowl of warm water for a few minutes until it reaches body temperature. A quick way to test it is to splash a few drops on your wrist; it should feel neutral or lukewarm, never hot.
You've probably noticed that stored milk separates, with a fatty cream layer rising to the top. This is completely normal and is actually a great sign of rich, high-quality milk!
To mix it back together, just give the bottle a gentle swirl. Try not to shake it vigorously, as that can break down some of the delicate milk proteins. A simple swirl is all it takes to make sure your baby gets all that fatty goodness in every sip.
These steps are especially important if you're sending bottles to daycare. For more great advice on making that transition a breeze, check out our guide on how to prepare your breastfeeding baby for daycare.
Troubleshooting Common Breast Milk Hurdles
Even with the best storage plan, you're bound to hit a few snags. It happens to all of us. You might notice a funny smell in your thawed milk or feel totally lost on how to pack bottles for daycare. Don't panic! These are common bumps in the road, and thankfully, they usually have simple fixes.
One of the most common "is this normal?!" moments is finding your thawed milk has a soapy or metallic smell. It can be pretty alarming the first time it happens, but take a deep breath. This almost never means your milk has gone bad. It’s usually just a little quirk of your milk’s chemistry.
What’s Up With That Soapy Smell? The Deal with High Lipase
That distinct smell is often caused by lipase, a natural enzyme in your milk. Its job is to help your baby break down and digest milk fats, which is great!
The thing is, lipase keeps working even after you’ve pumped and stored your milk. For some people, this enzyme is extra active, and it breaks down the fats so quickly that it changes the taste and smell after freezing and thawing. The milk is still 100% safe and nutritious, and honestly, a lot of babies don't even notice.
But if you have a little one with a more discerning palate, they might turn up their nose at it. If you discover your baby is rejecting your thawed milk, there’s a simple trick you can try with your fresh milk before you freeze it.
To prevent the taste change, you can scald your freshly pumped milk. Just gently heat it in a clean pot on the stove until you see tiny bubbles forming around the edges (that’s about 180°F or 82°C). The key is to not let it boil. Then, quickly cool it down in an ice bath before storing it.
This extra step deactivates the enzyme, stopping that soapy taste from developing later. It’s a bit of a pain, but it can be a total game-changer for saving your frozen stash from a picky drinker.
Taking Your Milk on the Go
So, what about when you need to leave the house? Whether you're sending milk to daycare, heading out for the day, or traveling, keeping that liquid gold at the right temperature is everything.
An insulated cooler with some frozen ice packs is your absolute best friend here.
- Chilled Milk: Pop your refrigerated bottles into the cooler with ice packs. They’ll stay safe and sound in there for up to 24 hours.
- Frozen Milk: When transporting frozen milk, pack the bags tightly in your cooler, stuffing ice packs in any gaps. A full cooler stays frozen way longer than a half-empty one.
It's no surprise that parents are always looking for better, easier ways to handle this. In fact, the global market for breast milk storage products is expected to grow by a CAGR of 7% between 2025 and 2033. It just goes to show how many of us are in the same boat, and you can learn more about these market trends on archivemarketresearch.com if you're curious. This demand means companies are constantly creating better coolers, bags, and bottles to make our lives a little less complicated.
Got More Questions About Storing Breast Milk?
Feeling a little overwhelmed by all the rules? You're definitely not alone. Let's tackle some of the most common questions that pop up when you're building that precious milk stash.
Can I Mix Warm and Cold Milk?
This is a big one. It's really tempting to just pour your freshly pumped milk into a bottle that's already chilling in the fridge, but it's best to hold off.
Adding warm milk to cold milk raises the overall temperature, which can unfortunately create a friendly environment for bacteria to grow. The safest bet is to cool the fresh milk in a separate container first. Once it’s chilled to the same temperature as the refrigerated milk, you can go ahead and combine them.
Why Does My Thawed Milk Smell Soapy?
If you've ever thawed a bag of milk and thought, "Wait, what is that smell?"—take a breath. A soapy or even metallic smell is almost always caused by lipase, a totally normal enzyme in your milk.
Lipase is there to help your baby digest the milk fats, but sometimes it works a little too well in storage. While it can change the taste, the milk is still 100% safe and nutritious.
Pro Tip: Many babies don't even notice the taste difference from high lipase. But if your little one is refusing the bottle, you can try scalding your fresh milk (heating it until tiny bubbles form around the edges, then rapidly cooling it) before you freeze it. This deactivates the enzyme.
What's the Best Way to Travel with Milk?
An insulated cooler packed with frozen ice packs is your absolute best friend for travel. The goal is simple: keep frozen milk frozen and refrigerated milk cold. Just remember to use any refrigerated milk within 24 hours of putting it in the cooler.
Flying? Good news! Breast milk is considered a medically necessary liquid. This means you're exempt from the usual 3.4-ounce limit. Just give the TSA agent a heads-up that you have it when you go through security to make the process smoother.
At Moogco Baby, we get it. We're here to support you with thoughtfully designed products that make the feeding journey just a little bit easier. You can explore our collection of feeding essentials and more over at MoogcoBaby.com.
Bring this guide home with 25% off.
Use code READER25 for 25% off →
Featured pick from Moogco
Hegen PCTO™ 60ml/2oz Breast Milk Storage PPSU, 6-Pack
$46.00
Shop this pick →
Frequently Asked Questions
Can I store breast milk in regular plastic containers from my kitchen?
It's best to avoid regular kitchen containers and stick with products specifically designed for breast milk storage. These are made from food-grade, BPA-free materials that won't leach chemicals into your milk. Regular containers may not seal properly or be safe for freezing, which could compromise the milk's quality and safety.
How do I know if my frozen breast milk has gone bad?
Spoiled breast milk will have a distinctly sour or rancid smell, very different from the slightly soapy scent of high lipase milk. It may also separate in an unusual way or have an off color. When in doubt, trust your nose and your instincts. If something seems really wrong, it's better to toss it than risk your baby's health.
Should I freeze milk right after pumping or refrigerate it first?
You can do either, and both are safe! If you're planning to use the milk within 4 days, refrigerate it to preserve more of the live antibodies. If you know you won't need it soon, go ahead and freeze it right away. Some moms like to chill it in the fridge first and then move it to the freezer within 24 hours, which can help maintain quality.
Can I add freshly pumped milk to already frozen milk?
It's not recommended to pour warm, freshly pumped milk directly onto frozen milk because it can partially thaw the frozen portion. If you want to combine them, first chill the fresh milk in the fridge for at least an hour or two, then add it to the frozen container. This keeps everything at a safe, consistent temperature.
Is it okay to reuse breast milk storage bags?
No, disposable breast milk storage bags are designed for single use only. Reusing them increases the risk of contamination and bacterial growth, even if you wash them thoroughly. The bags can also develop tiny tears or weak seals after the first use, making leaks much more likely.
What's the safest way to thaw frozen breast milk?
The safest method is to thaw it slowly in the refrigerator overnight, which takes some planning but preserves the most nutrients. If you need it faster, you can place the sealed bag or bottle in a bowl of warm (not hot) water or hold it under lukewarm running water. Never use the microwave, as it creates hot spots and can destroy valuable antibodies.
How long can thawed breast milk stay in the fridge?
Once you've thawed frozen breast milk in the refrigerator, you should use it within 24 hours. Never refreeze milk that's already been thawed, as this can significantly increase bacterial growth. If your baby doesn't finish the bottle, any leftover thawed milk should be discarded within 1 to 2 hours after the feeding.
Do I need a separate freezer for my breast milk stash?
Not at all! Your regular kitchen freezer works just fine for most families. Just make sure it maintains a consistent temperature of 0°F or colder and store the milk in the back, away from the door. If you're planning to build a really large stash for several months, a small deep freezer can be helpful but it's definitely not a necessity for most moms.
From Moogco Studio
Printable and personalized nursery essentials. Designed by moms for moms.


About the Editor
Eda Ulger is the editor at Moogco Baby and a mom of two. She curates and edits our guides so every piece is honest, practical, and genuinely helpful for the early days of motherhood.